
Building a Redis Clone – Part 2.0: Turning a Single Node into a Distributed Cluster

Hi, I hope you are doing well. In the last episode of the “Building a Redis Clone From Scratch” series, we built a simple single-node key-value store that stores data in Java ConcurrentHashMap and communicates via TCP Server. In this post we are going to dive deeper and convert that single-node application into a distributed application.
Important: I am a beginner in distributed systems and am learning through hands-on projects. These tutorials are not intended to showcase best practices, but rather to share my learning journey and foster understanding of core concepts.
Read Part 1:

Part 2 Table of Contents:
Snapshotting - Data Backup
Distributed Nodes
Cluster creation and joining
Heartbeat health checking
Current state of application:
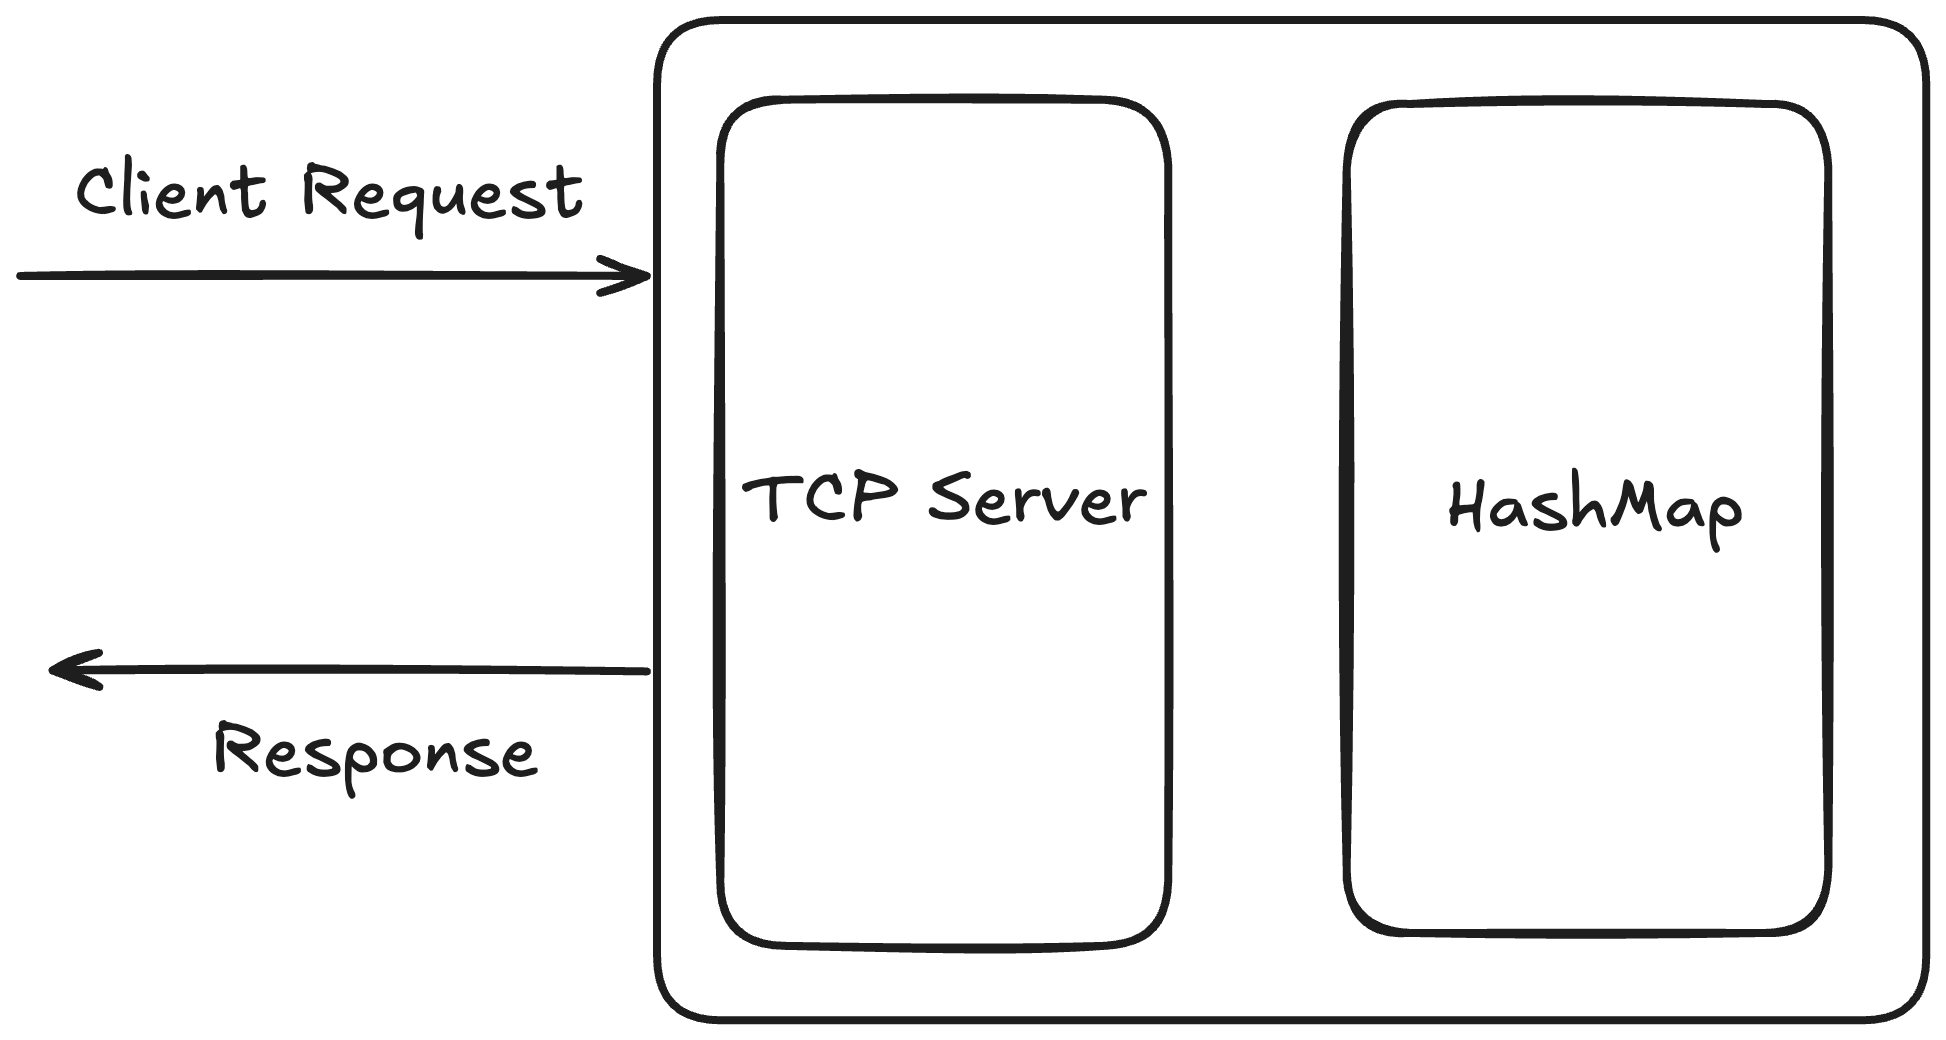
Currently we have a single-node application where requests and responses are served through TCP connections.
This setup will work at a small scale, but at a larger scale it will fail because:
A limited amount of data can be stored in a single machine.
If due to any reason this machine or application instance is destroyed, we will lose our data, because there are no replicas (copies of data).
This is not horizontally scalable.
So how do we address these issues?
All the problems are because of only a single instance/node of our key-value store. What if we have multiple instances/nodes of our application? This will solve all the above-mentioned issues.
Multiple nodes will increase the data storage limits.
Our data will be safe because we can make copies of data in several nodes.
Infra will be horizontally scalable because we can add as many nodes as we want to increase system capabilities.
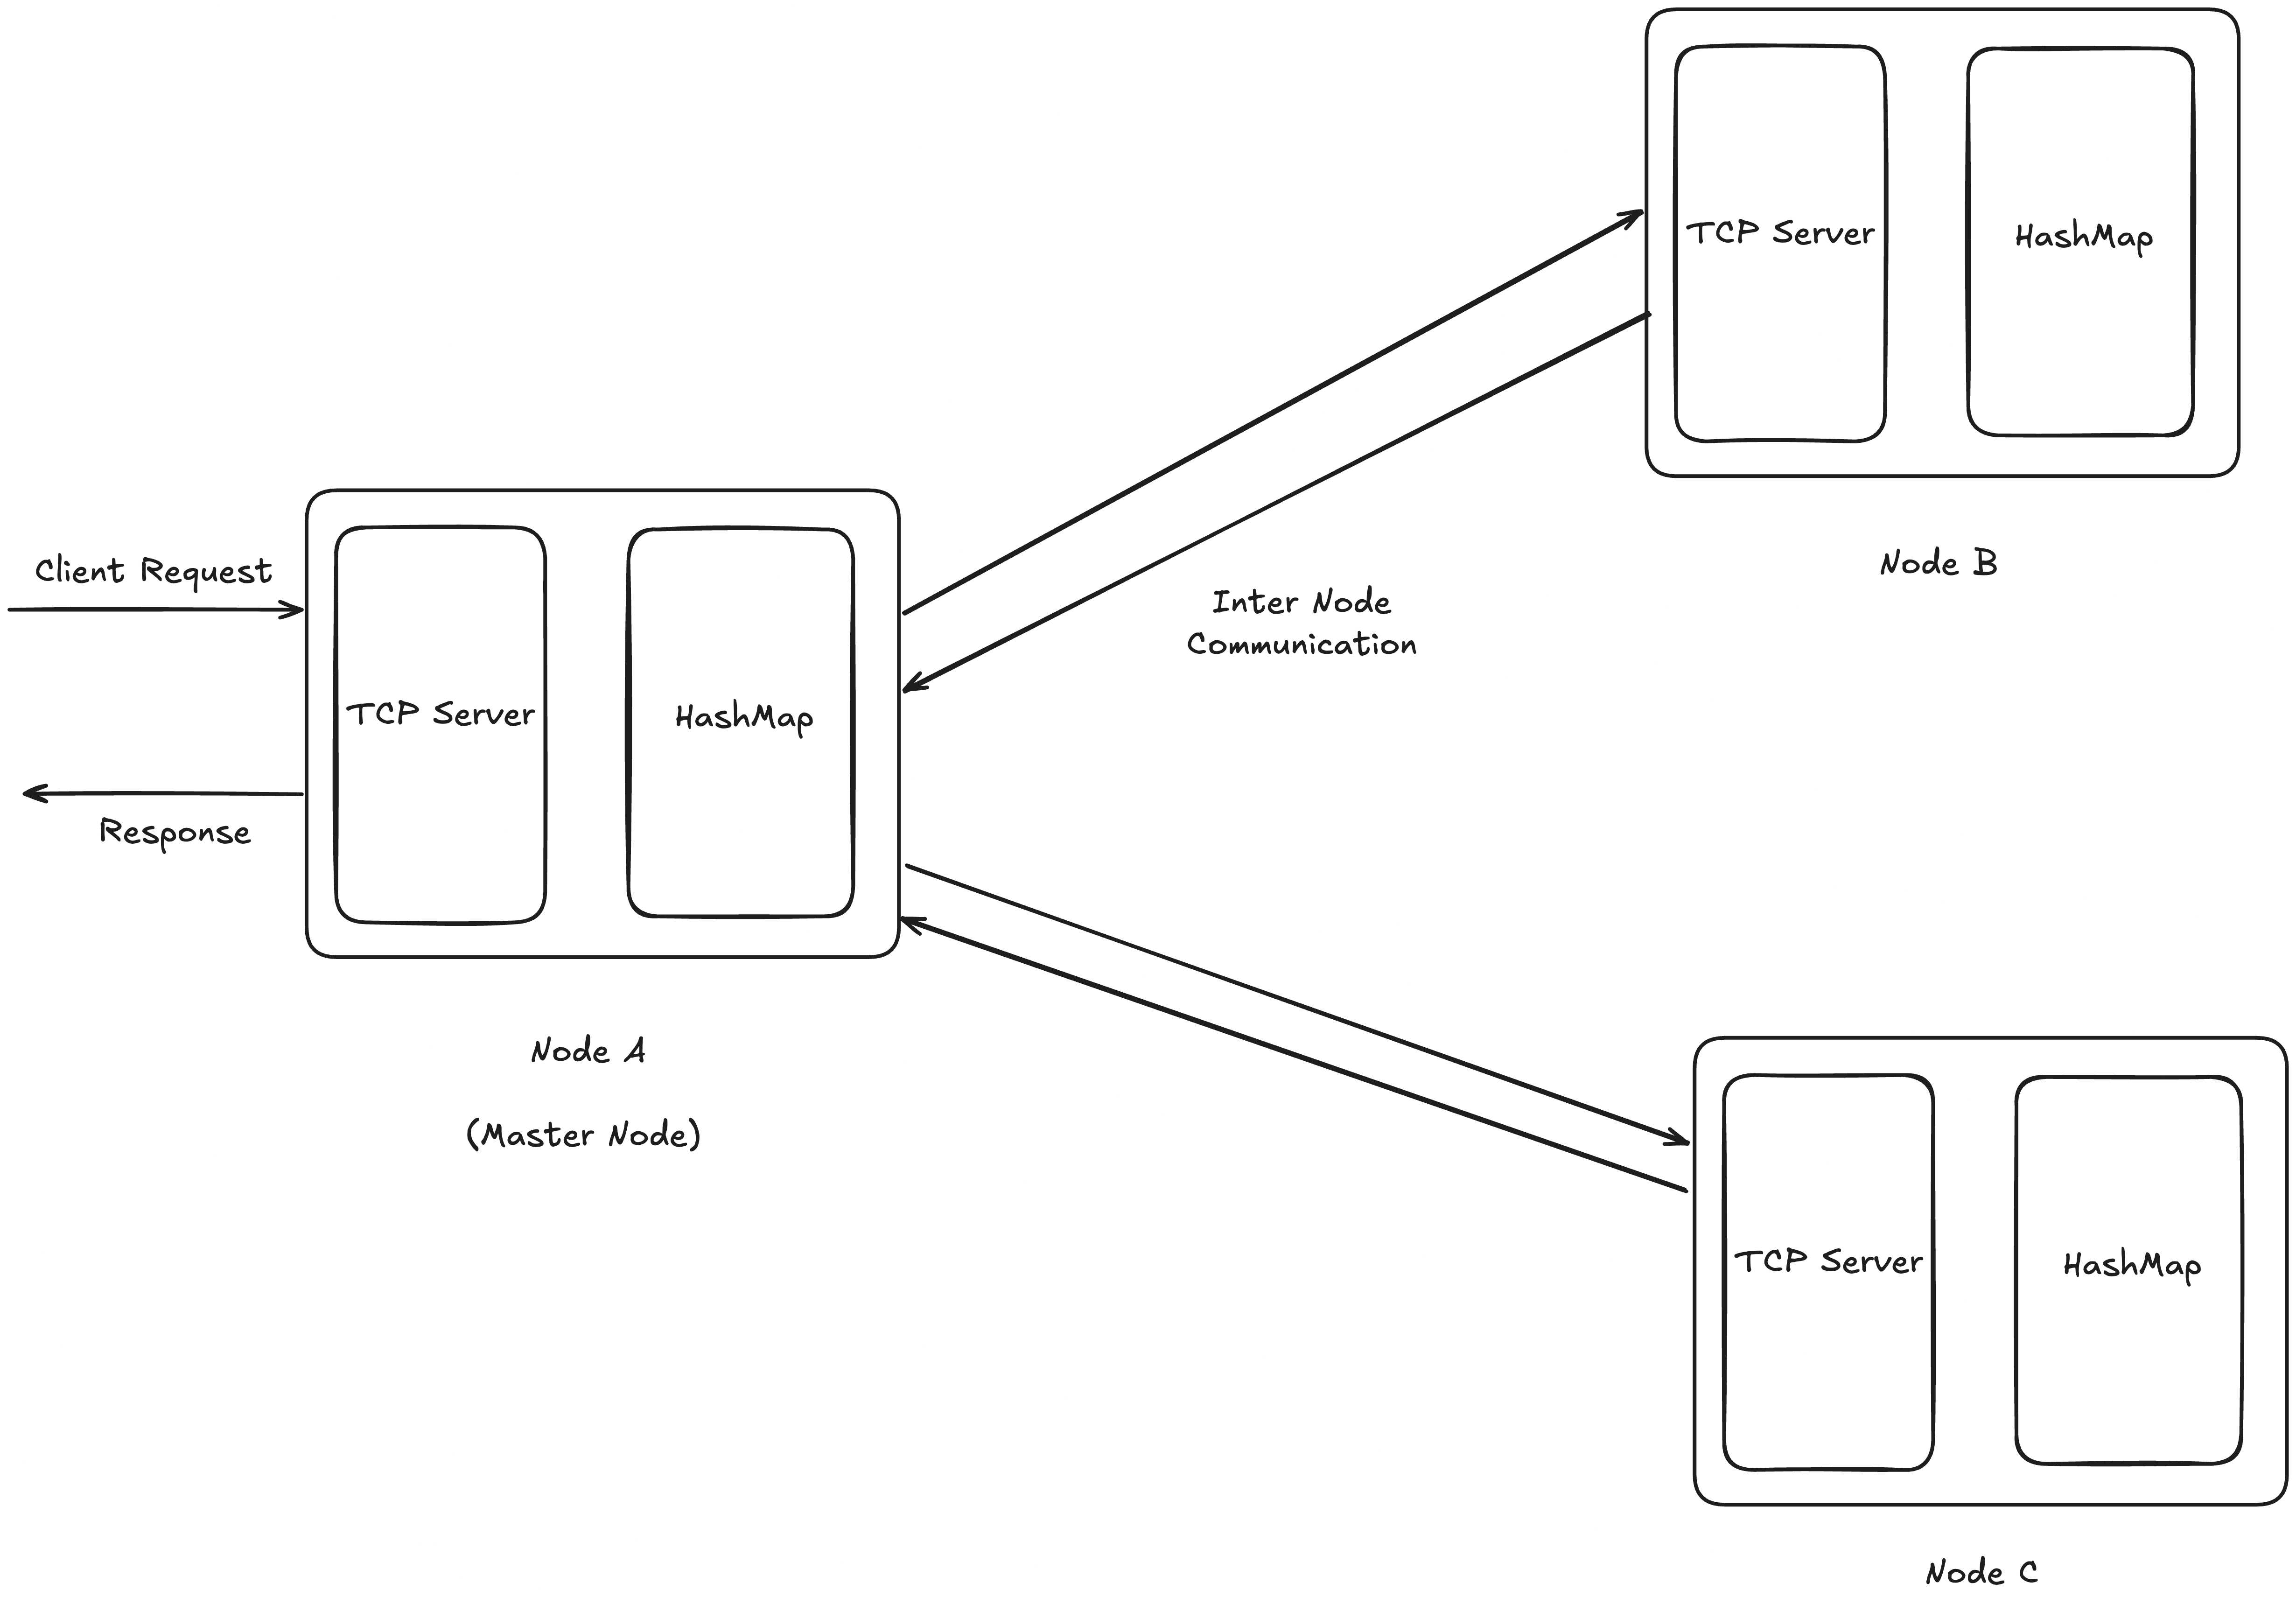
This is how our system will look in a distributed environment. There will be a master node that will accept all the requests from the client and coordinate with all other nodes. This combination of nodes is called a cluster.
In order to make this cluster, we need each and every node to know about other nodes. So in this part we will be writing code for creating this cluster of nodes.
But before lets Persist Data
We are missing an important feature from our application, and it is data persistence. As we know that ConcurrentHashMap stored all the data in RAM, and it will be erased if the application is restarted. But we need to persist this data between restarts. Let’s work on it first.
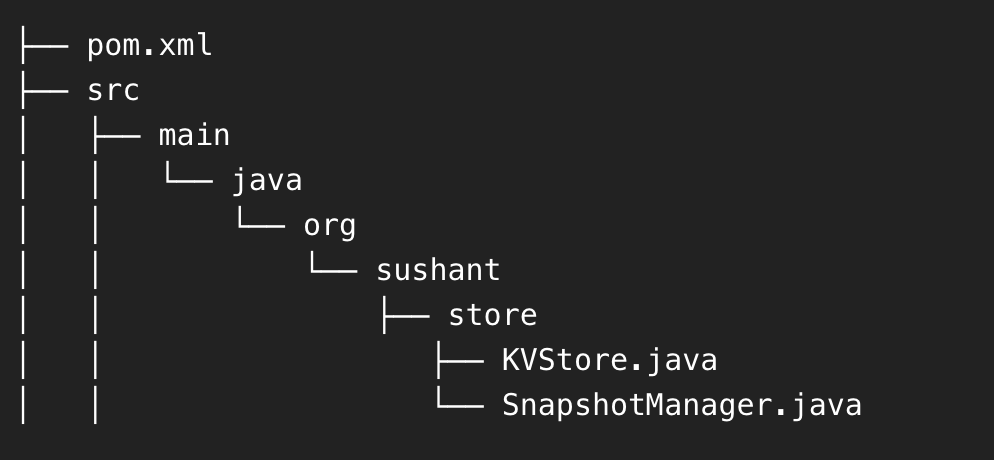
Inside our `store`package'', create a new class SnapshotManage. This will be responsible for storing data of our ConcurrentHashMap in a file named store. snapshot and load all the data from this file on application restart.
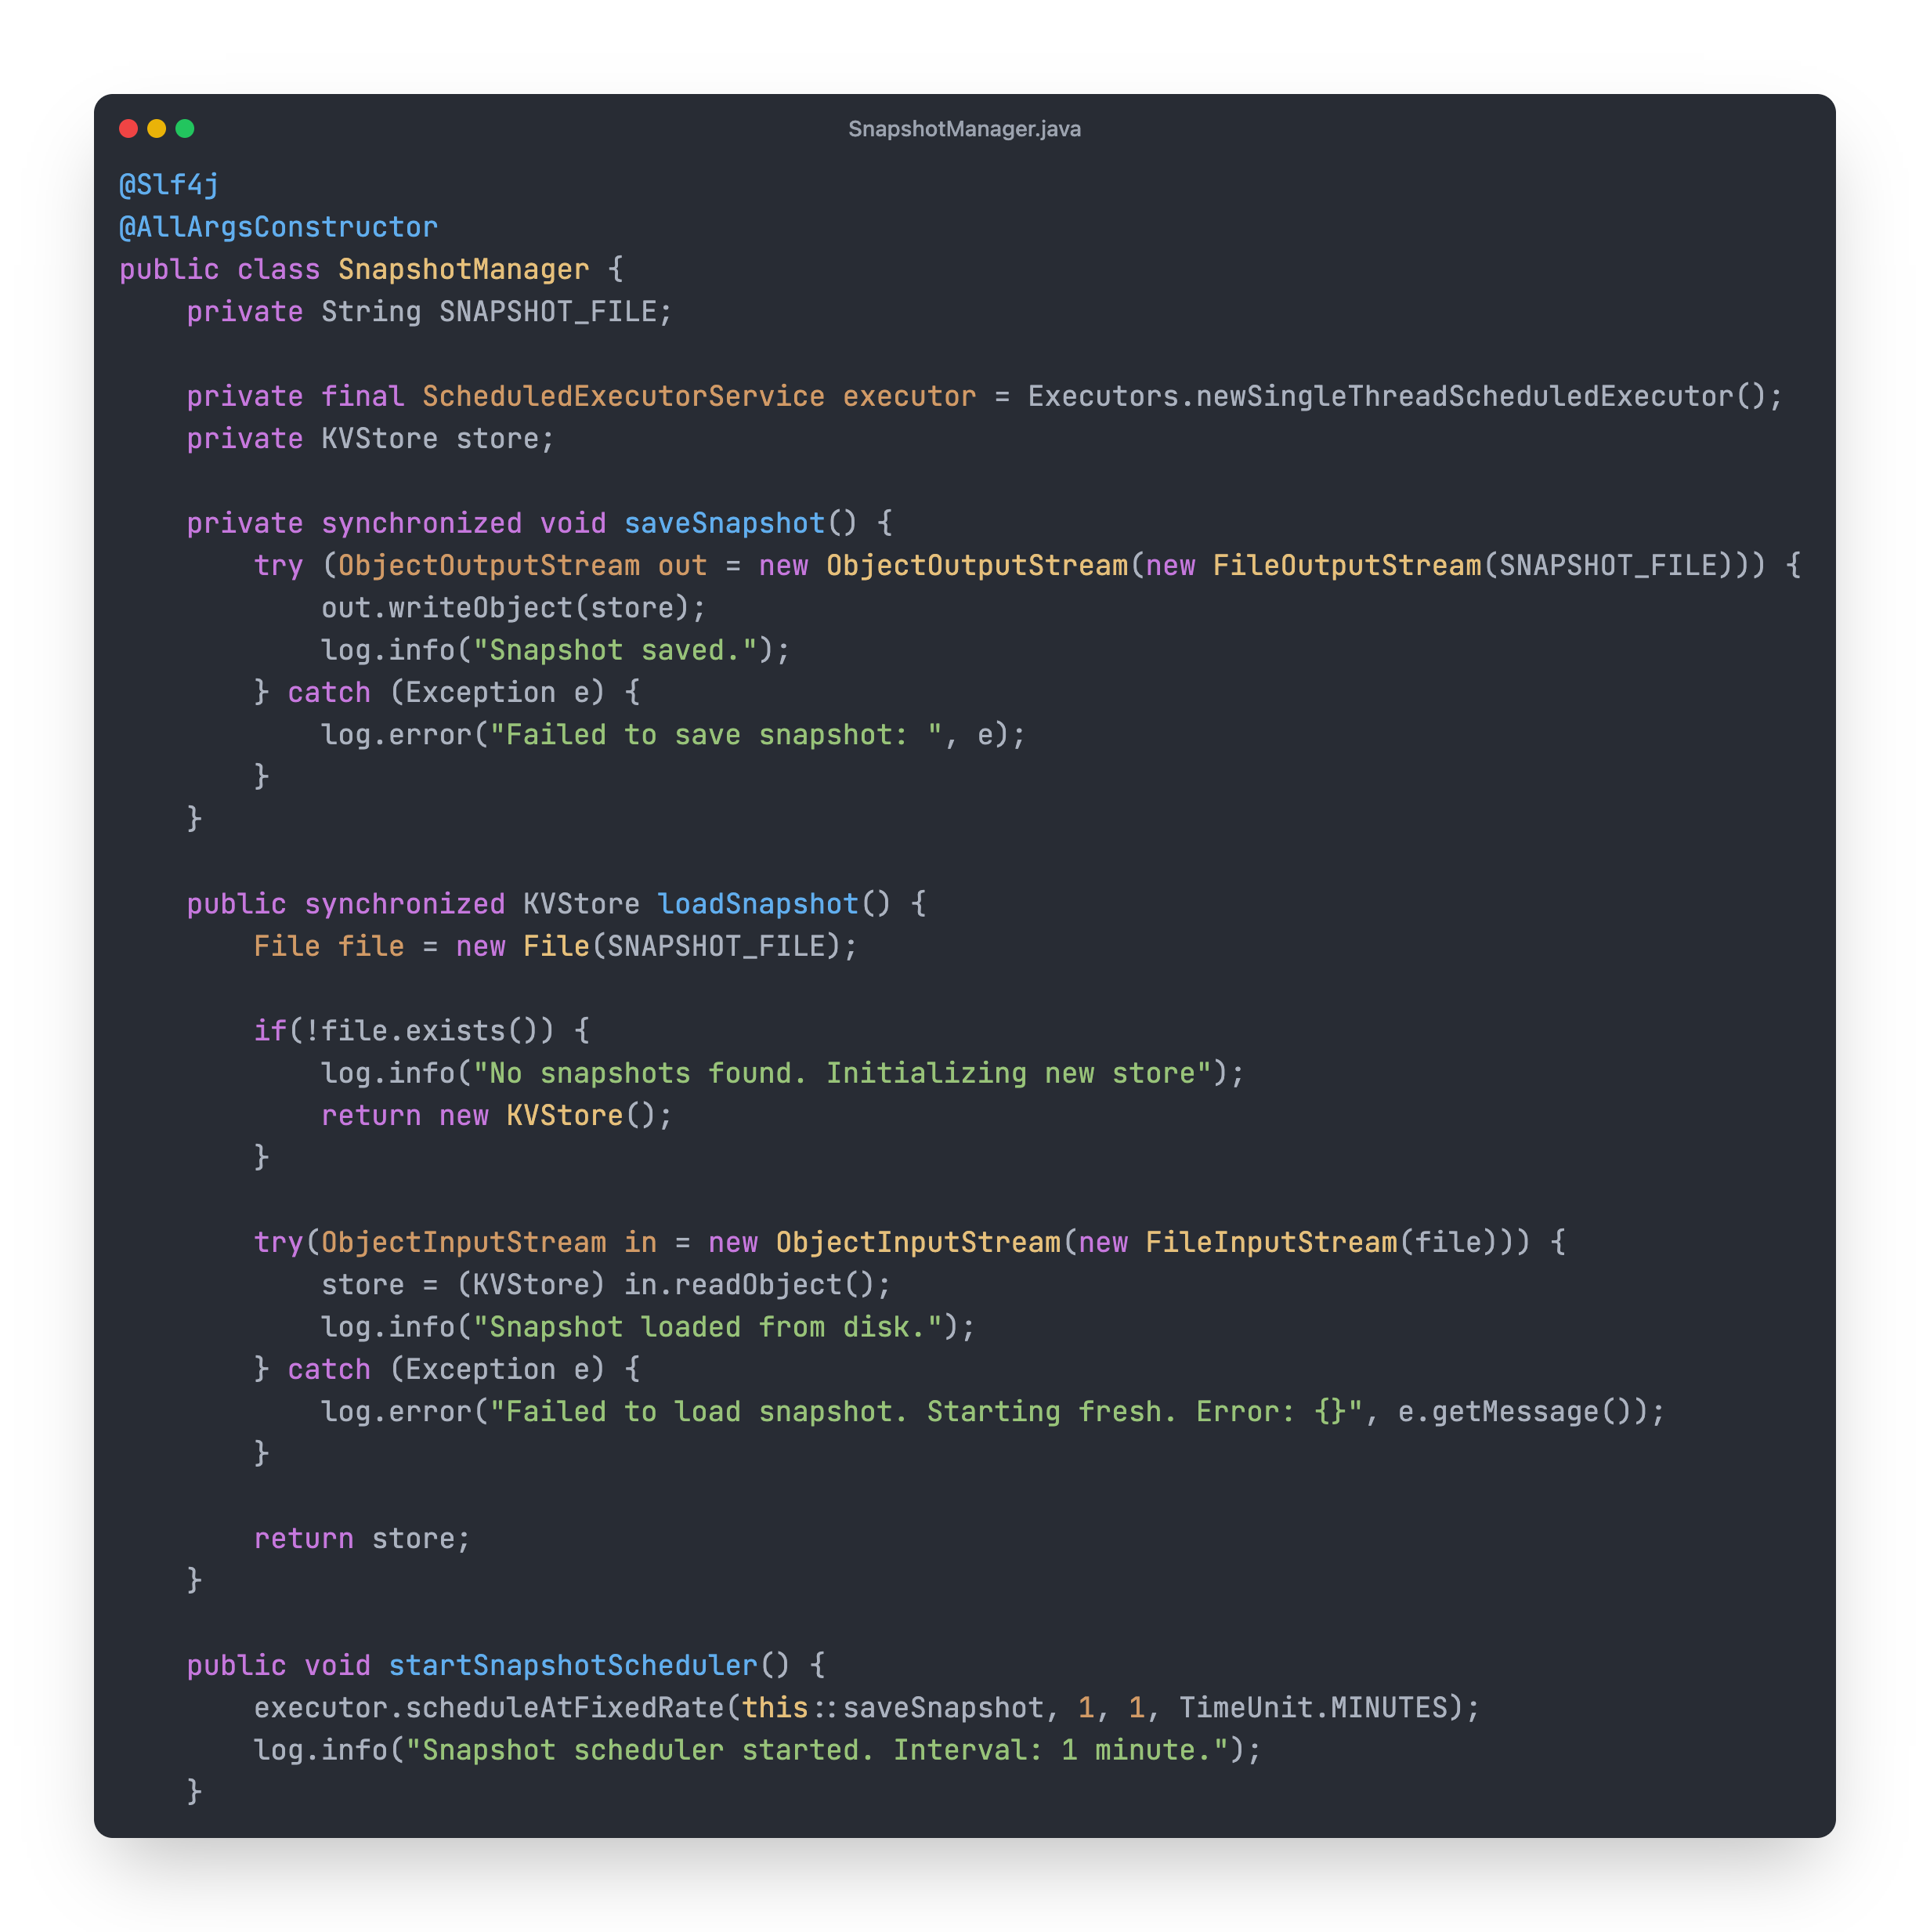
So what this class does is:
Takes the KVStore object and stores it in a file using ObjectOutputStream.
Expose a loadSnapshot method that loads data from the file if present.
If no snapshot file is present, it initialises a new object of KVStore.
If a snapshot file is present, it converts that file data into a KVStore object and returns it.
• The saveSnapshot method is scheduled with Executor. It will take a snapshot of KVStore and its data every minute.
In our Main.java class:

Instead of creating a new instance of KVStore on application startup, we are using loadSnapshot method from SnapshotManager class.
IMPORTANT:
Before making things more complex for you let’s first understand what this cluster really means and how will nodes form a cluster.
What is a cluster?
In a distributed system, a cluster is simply a group of nodes (servers) that work together as if they were a single system. Each node runs the same application and can store part (or all) of the data. Together, these nodes improve storage capacity, fault tolerance, and scalability.
Think of it like a group of friends sharing a big task. If one friend is busy or unavailable, others can step in and help — the work still gets done.
How Will Our Nodes Form A Cluster?
Our goal is to make sure every node in the system knows about all the other nodes. This way, they can communicate, share data, and work together.
Here’s the approach we’ll use:
Each Node Has a List of Other Nodes’ Addresses
Every node will be started with a list of IP addresses (and ports) of other nodes it should connect to.Each Node Maintains a Map of All Known Nodes
Inside each node, we’ll keep a map (in memory) of all other nodes that are part of the cluster.Joining the Cluster with an HTTP Endpoint
Every node will expose an HTTP endpoint/join.When this endpoint is called, the node will add the caller to its map of known nodes.
This is like saying: “Hey, I’m here! Add me to your contact list.”
Automatic Joining on Startup
When a node starts, it will:Go through its list of known IP addresses from the startup configuration.
Call
/joinon each of those nodes, telling them: “I’ve joined the party — please add me.”This ensures that all nodes quickly become aware of each other.
Nodes Clustering
So first we will need to define the structure of our node. When I say 'node', I mean a single running instance of our application.
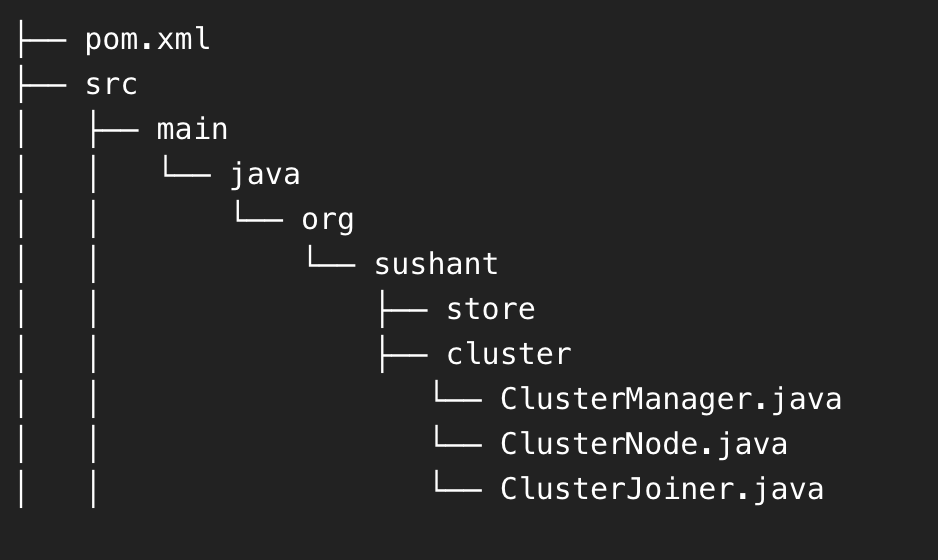
Create a new package named `cluster` as shown in the below screenshot, and create the files mentioned in the same screenshot.
Inside ClusterNode class write following code.
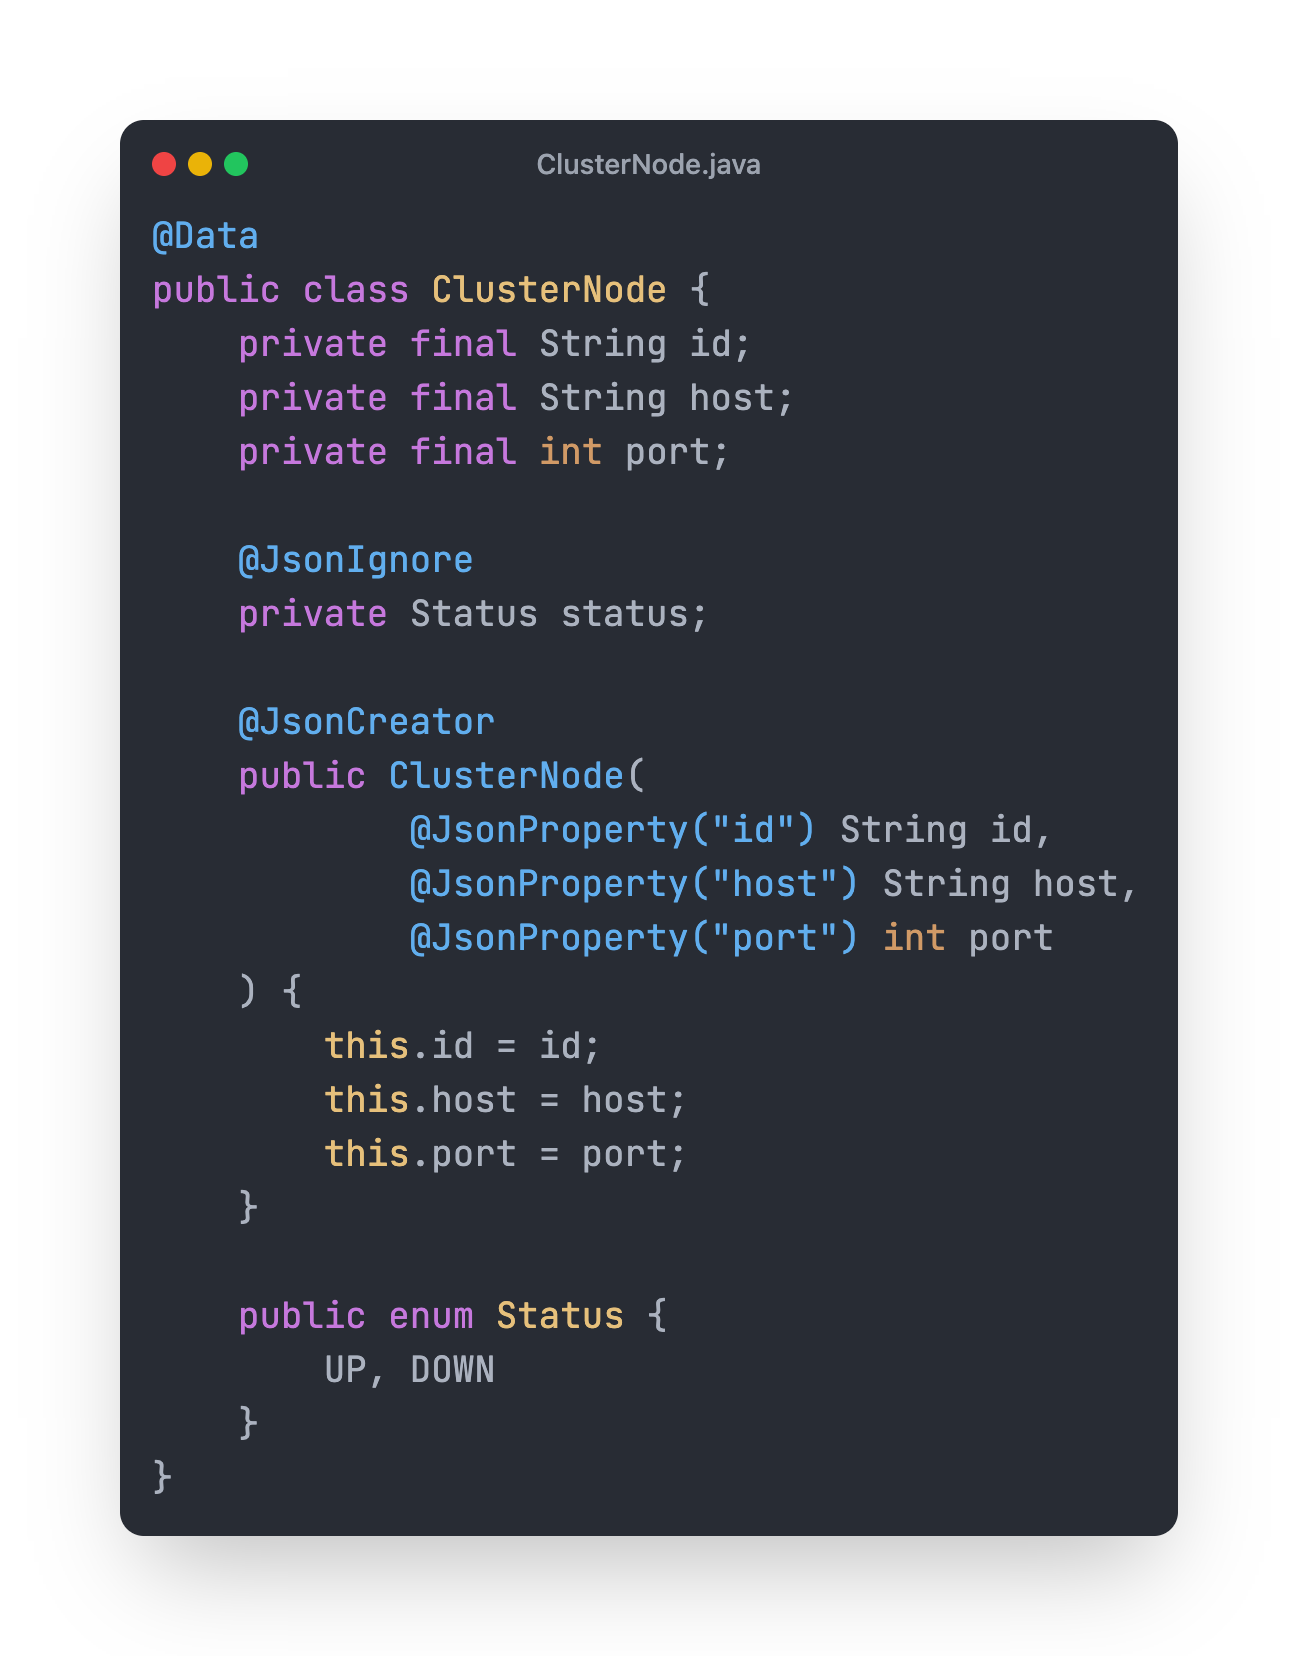
This POJO represent node structure. Our node will have:
id: For uniquely identifying in cluster.
host: IP Address on which this node is running.
port: Port on which this node is running.
status: Whether it is up or down.
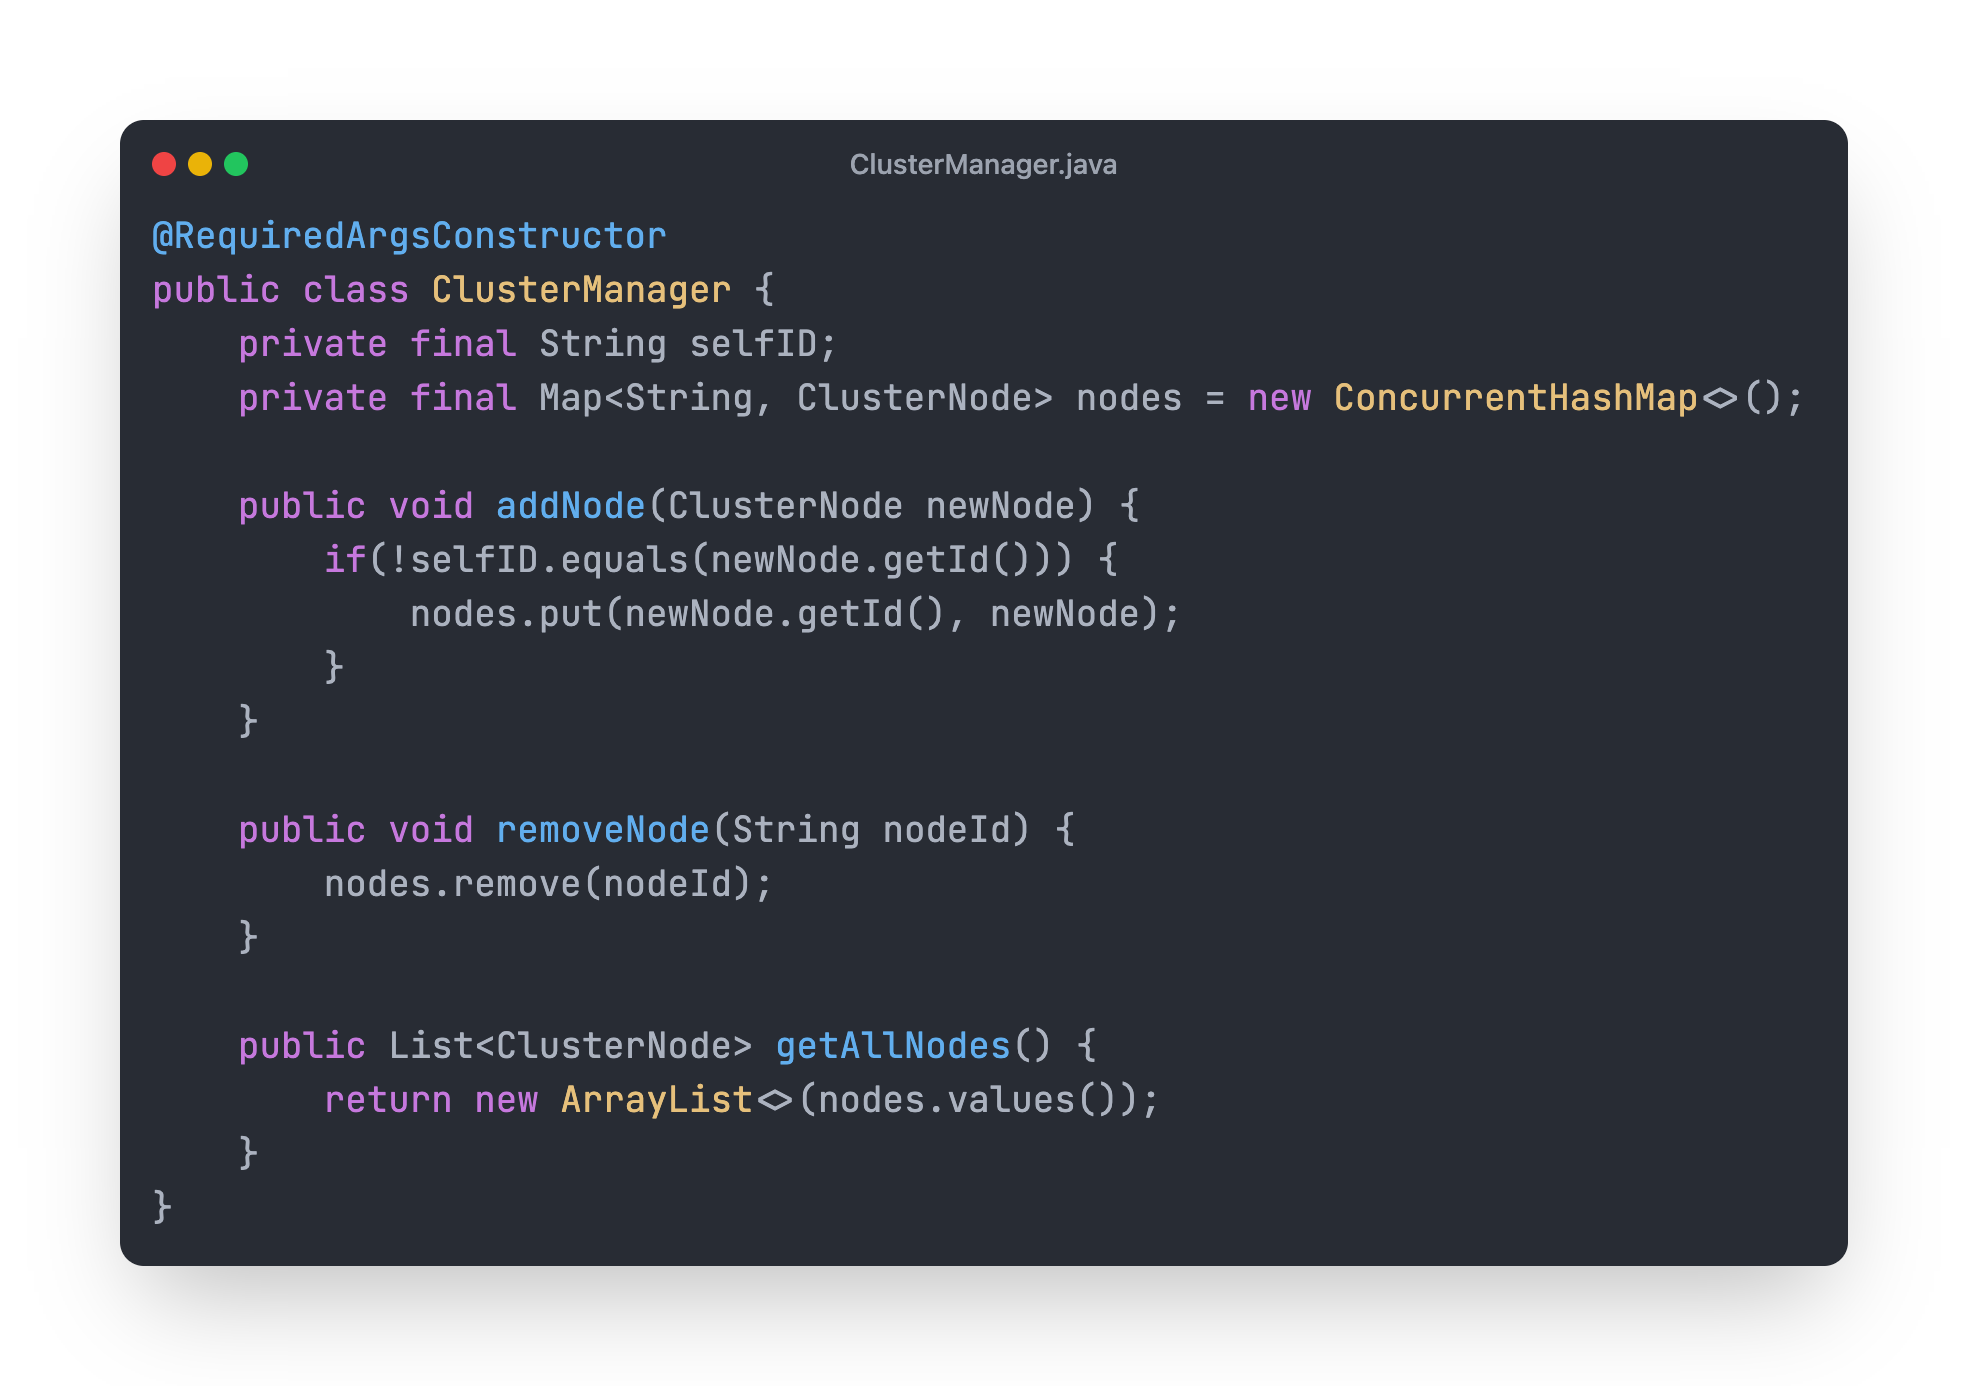
ClusterManager
This class is responsible for Adding, Removing and Getting All the nodes data.
/join HTTP Endpoint
Now we need to expose an HTTP endpoint that will be invoked by other nodes in the cluster.
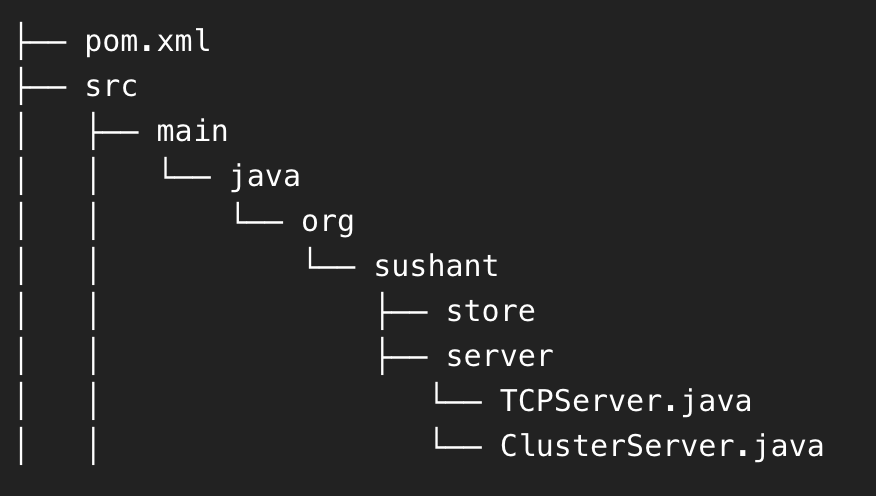
Create a new class ClusterServer in server package.

This class uses Javalin.io a simple and light weight HTTP framework. We are exposing start() method that uses Javalin.create() to create a new HTTP Server.
Whenever a HTTP Post request is sent to /join endpoint HandleJoinCluster class will be invoked. Below is the code for that.
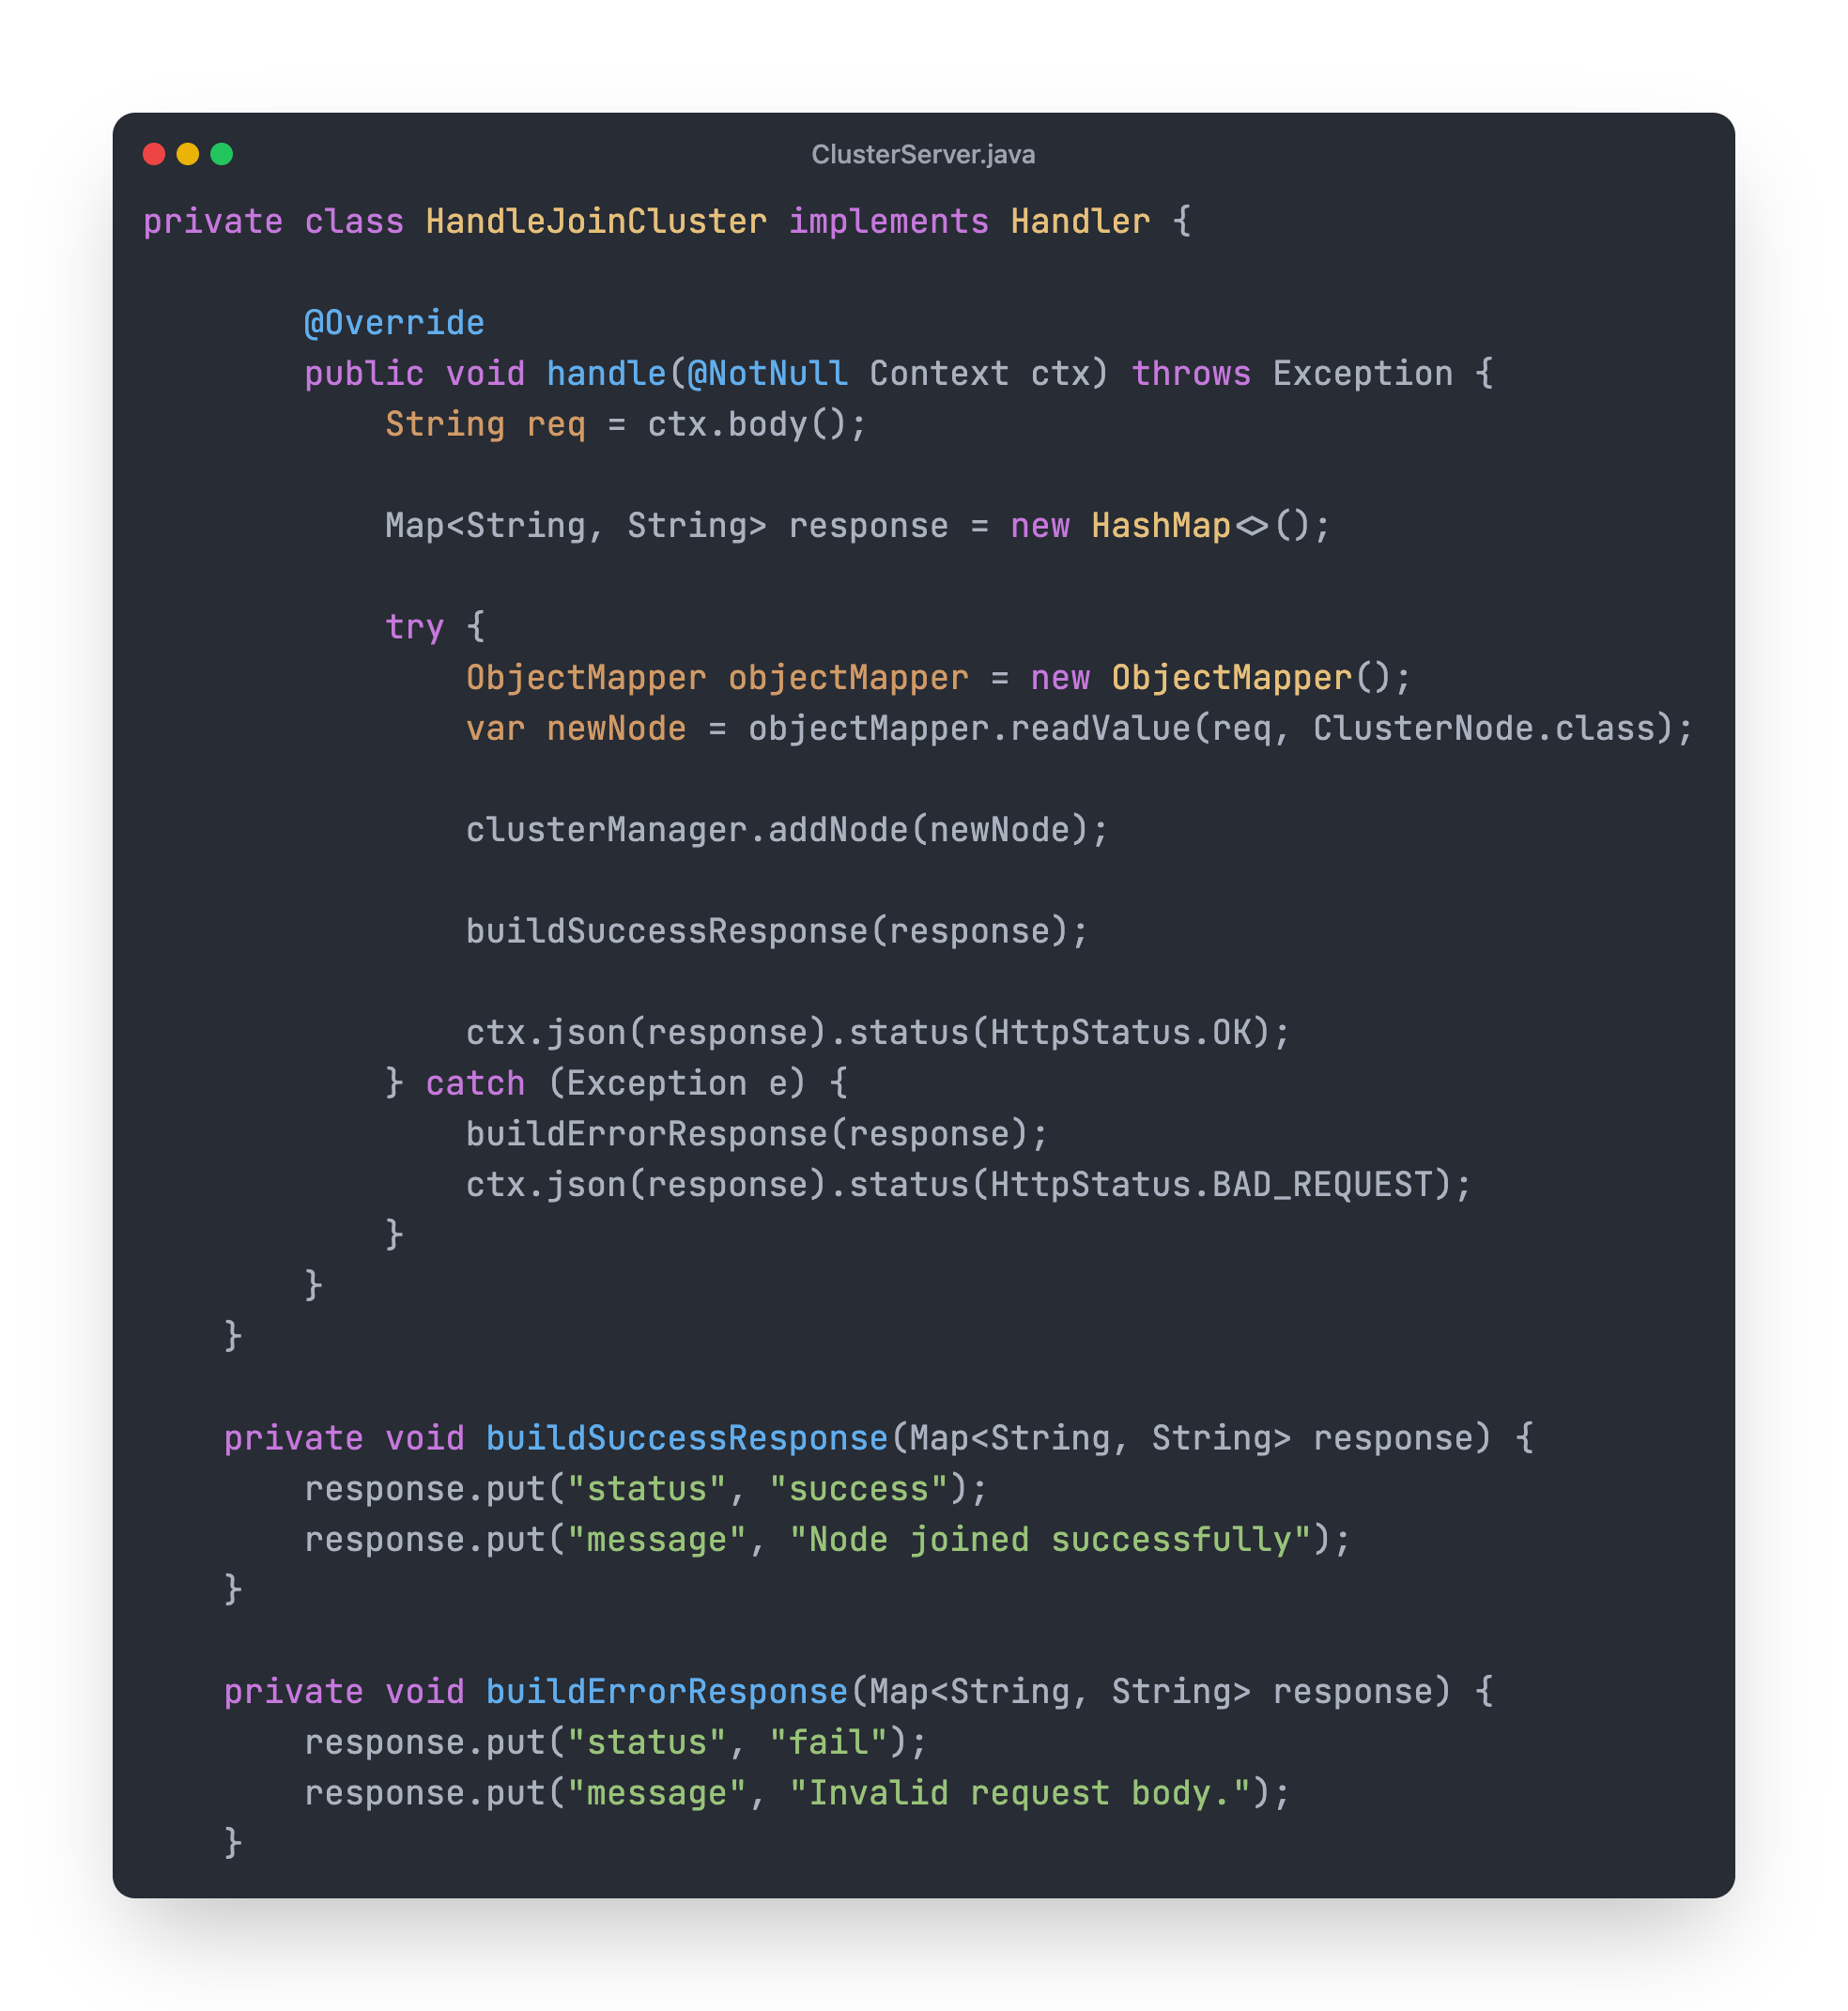
Code for this class is self-explanatory.
It read the request body.
Convert request body into ClusterNode object using ObjectMapper.
Uses the addNode method from ClusterManager to add the caller node to the local nodes list.
Then it builds a success or error response and returns to the caller.
Other nodes can now join our node by invoking the /join endpoint. We will now create a way for our node to call other nodes on startup.
We will cover the remaining in the next posts.
Stay tuned! Subscribe to this newsletter for free, and the next parts will reach your mailbox.
Is this open source ?