
Convert VIM to Code Editor in 8 Easy Steps - Beginner Friendly

In this post we are going to convert fresh Neovim Setup to a complete Code Editor from scratch and this post is completely beginner friendly. After reading this post you will be able to customize Neovim according to your wishes.
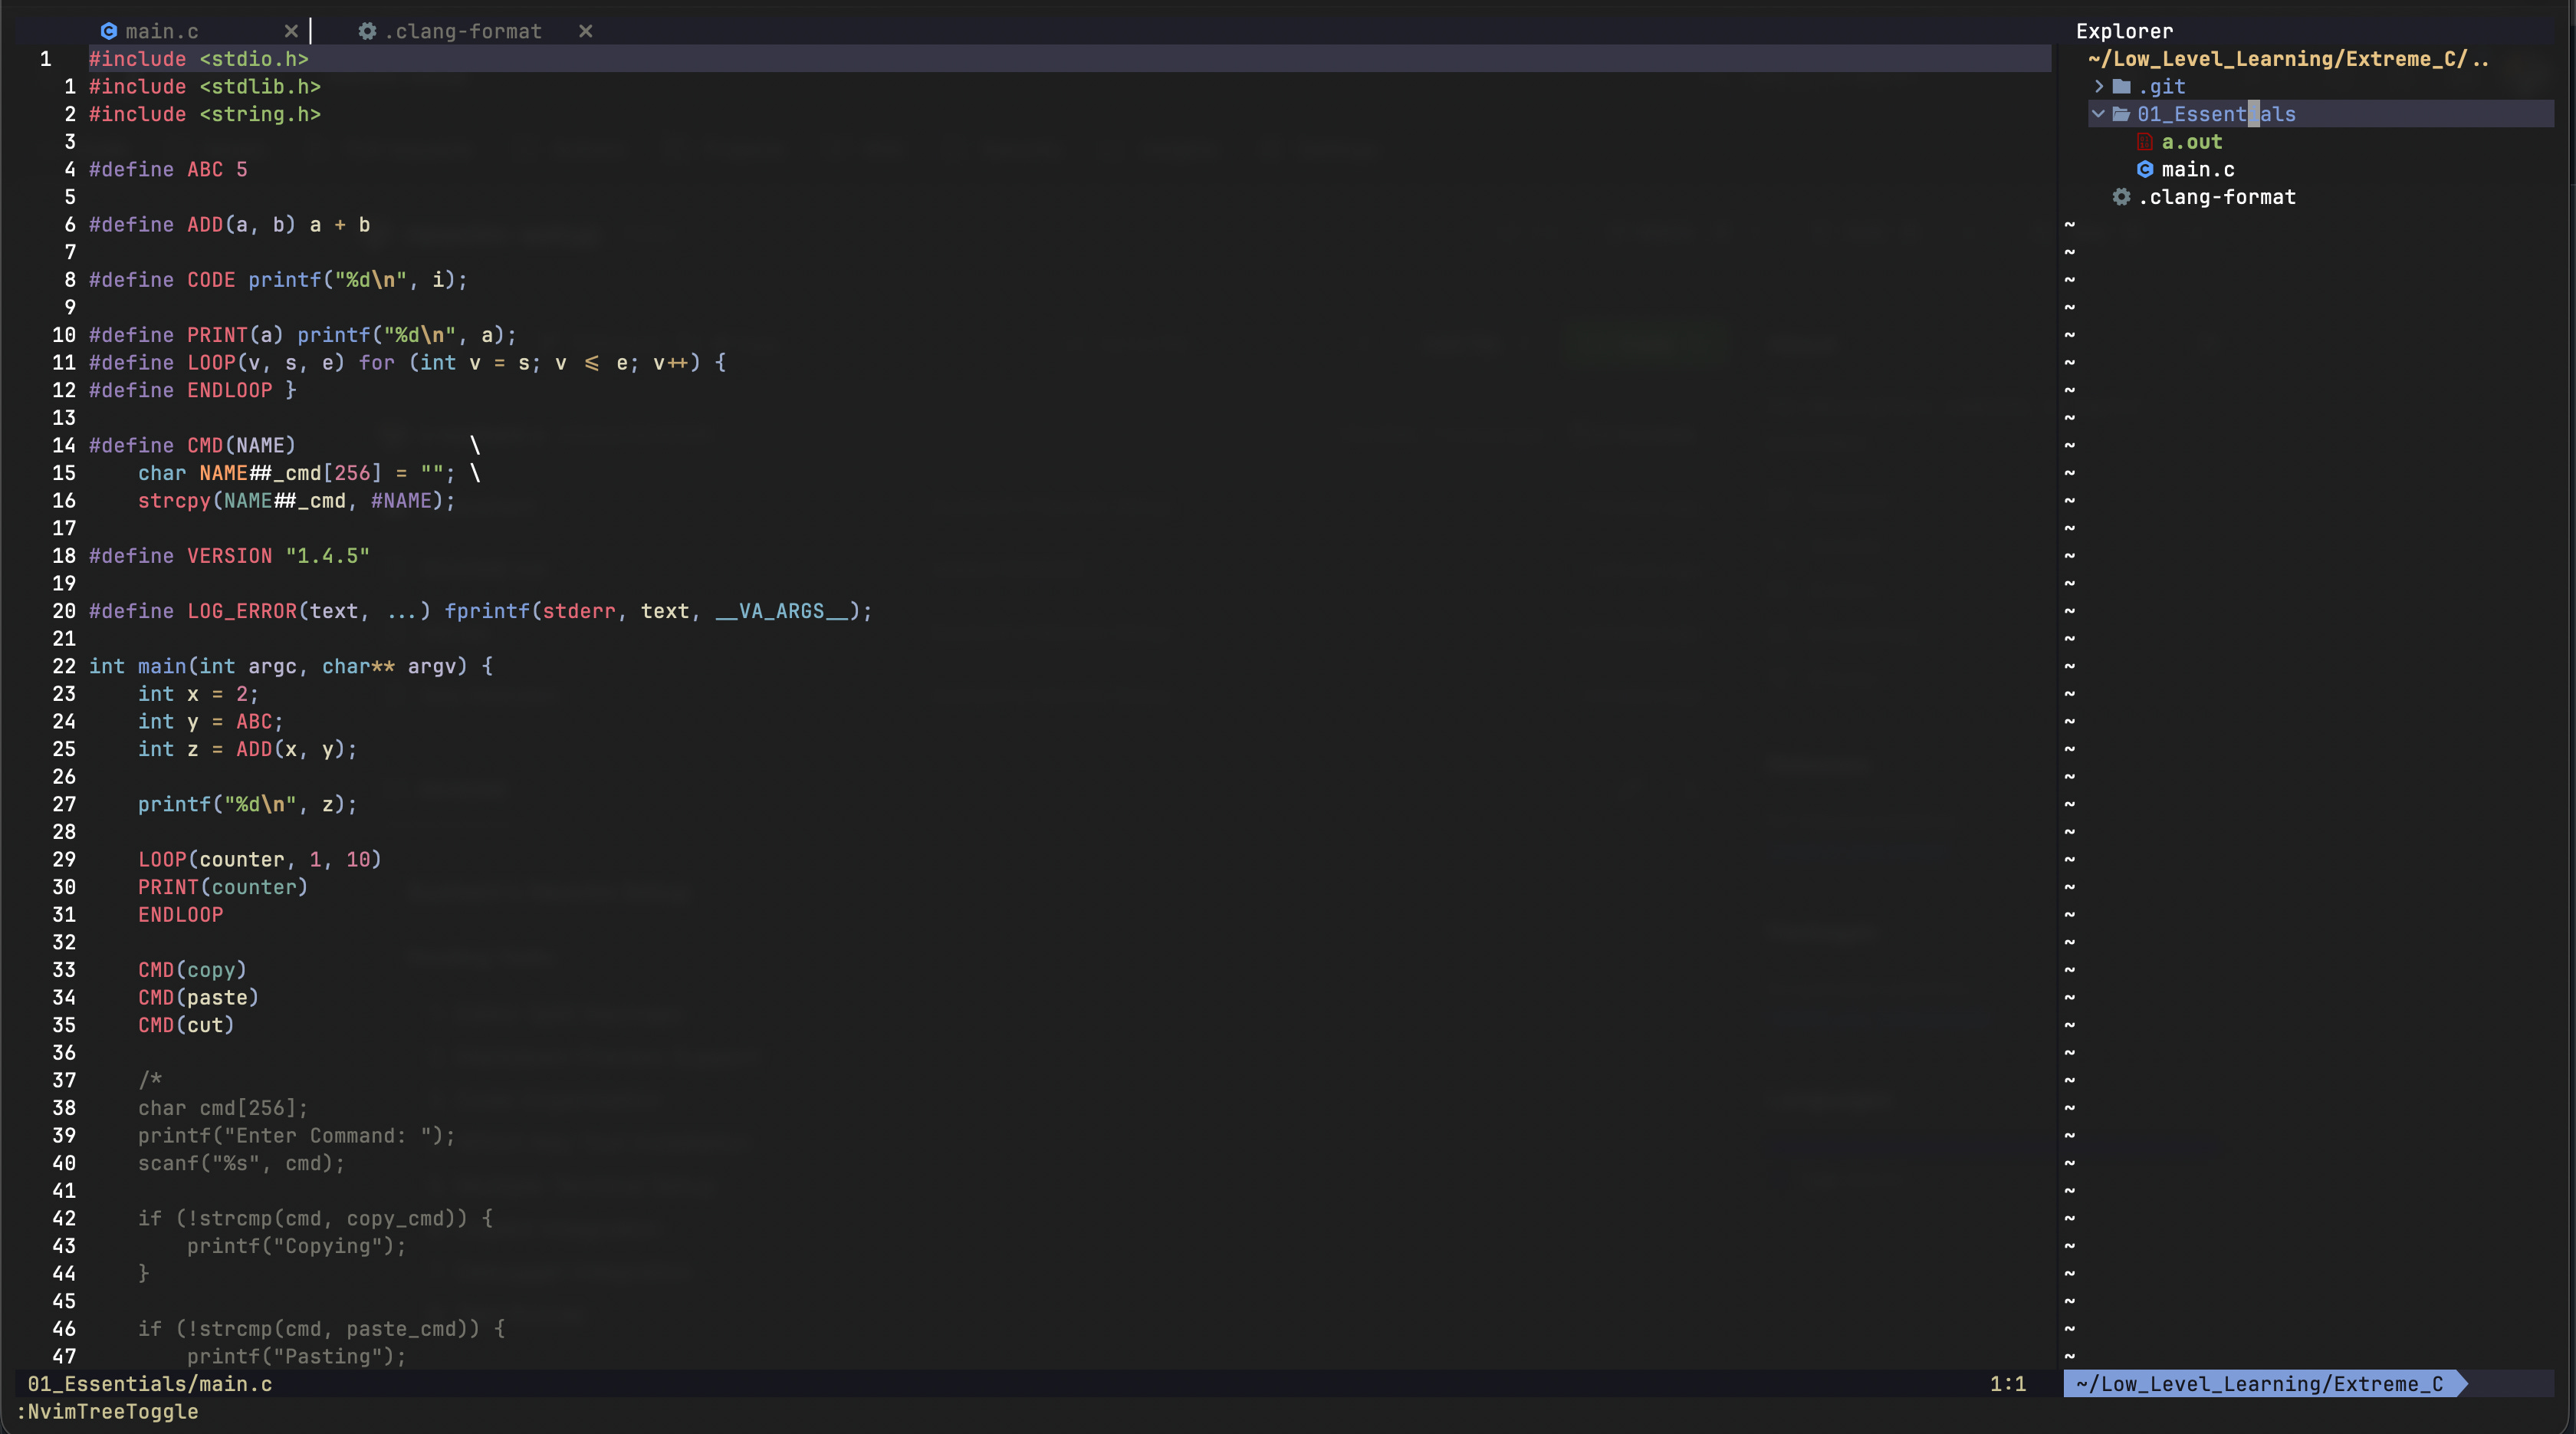
Result
Let’s first see how our final Neovim setup will look like.
Features Included:
Auto Completion
Code Highlighting
Themes
Error Lens (like VS Code)
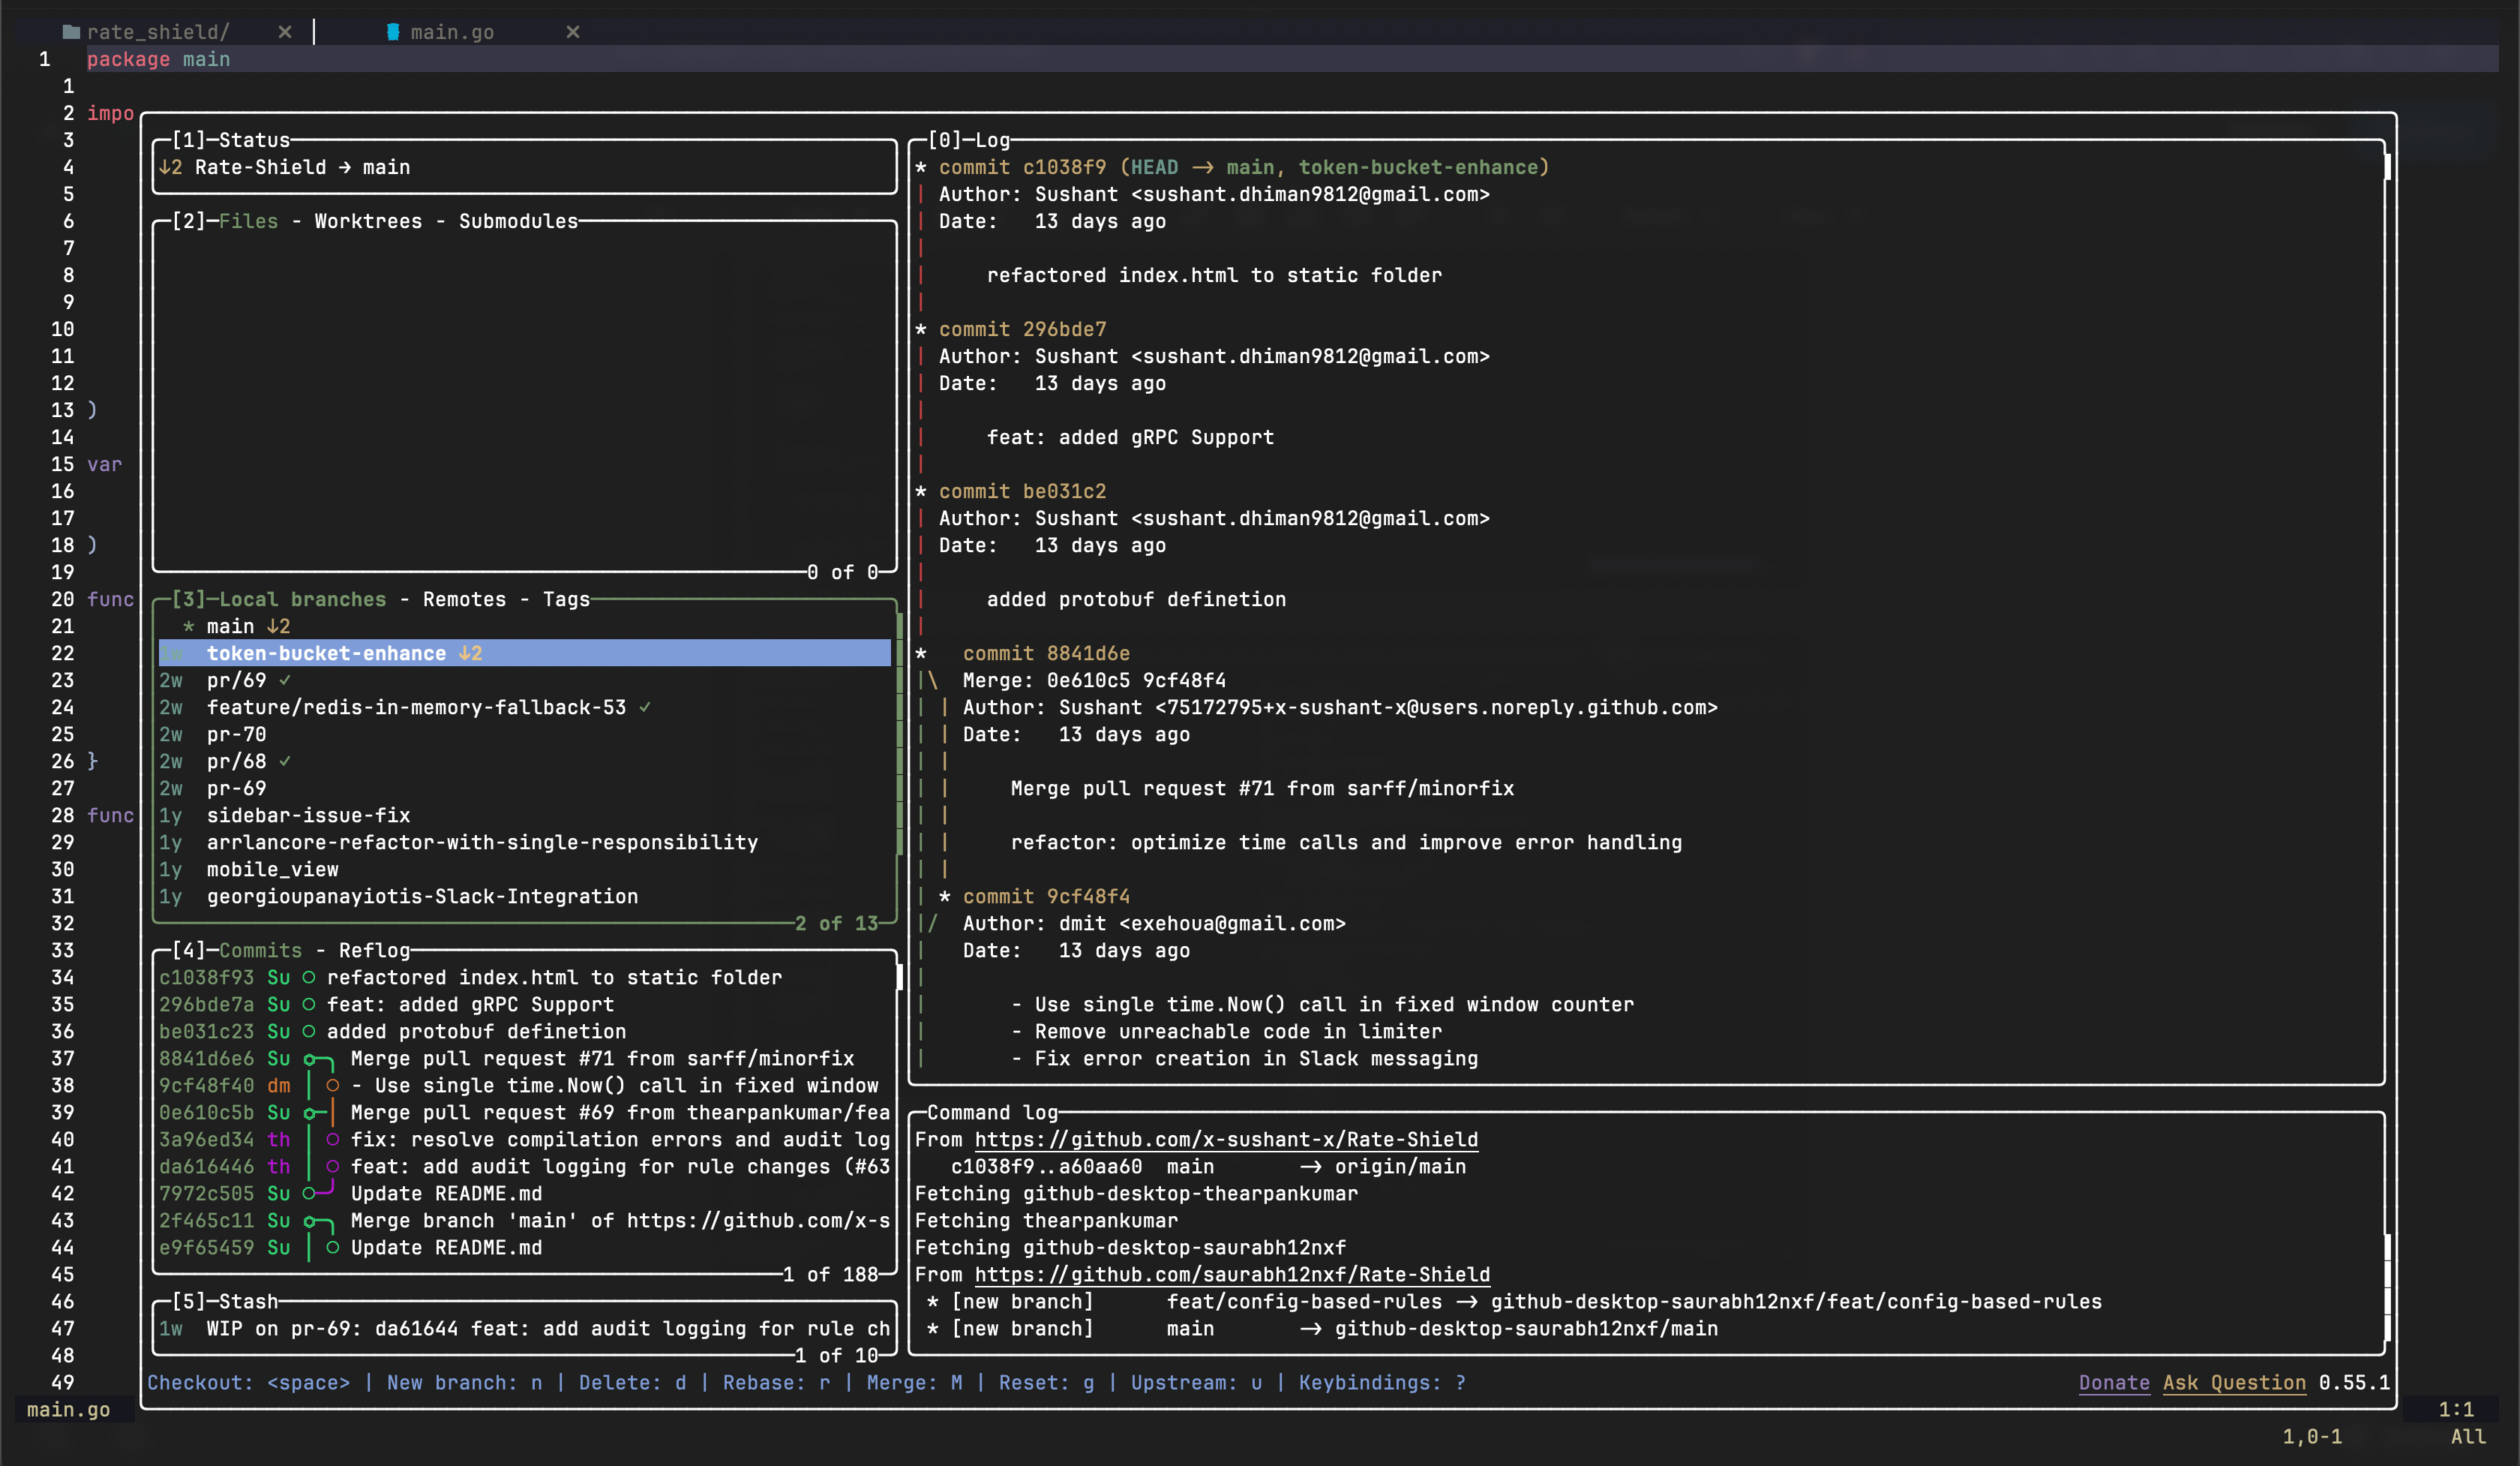
LazyGit Integration
Language Server Protocol for any language
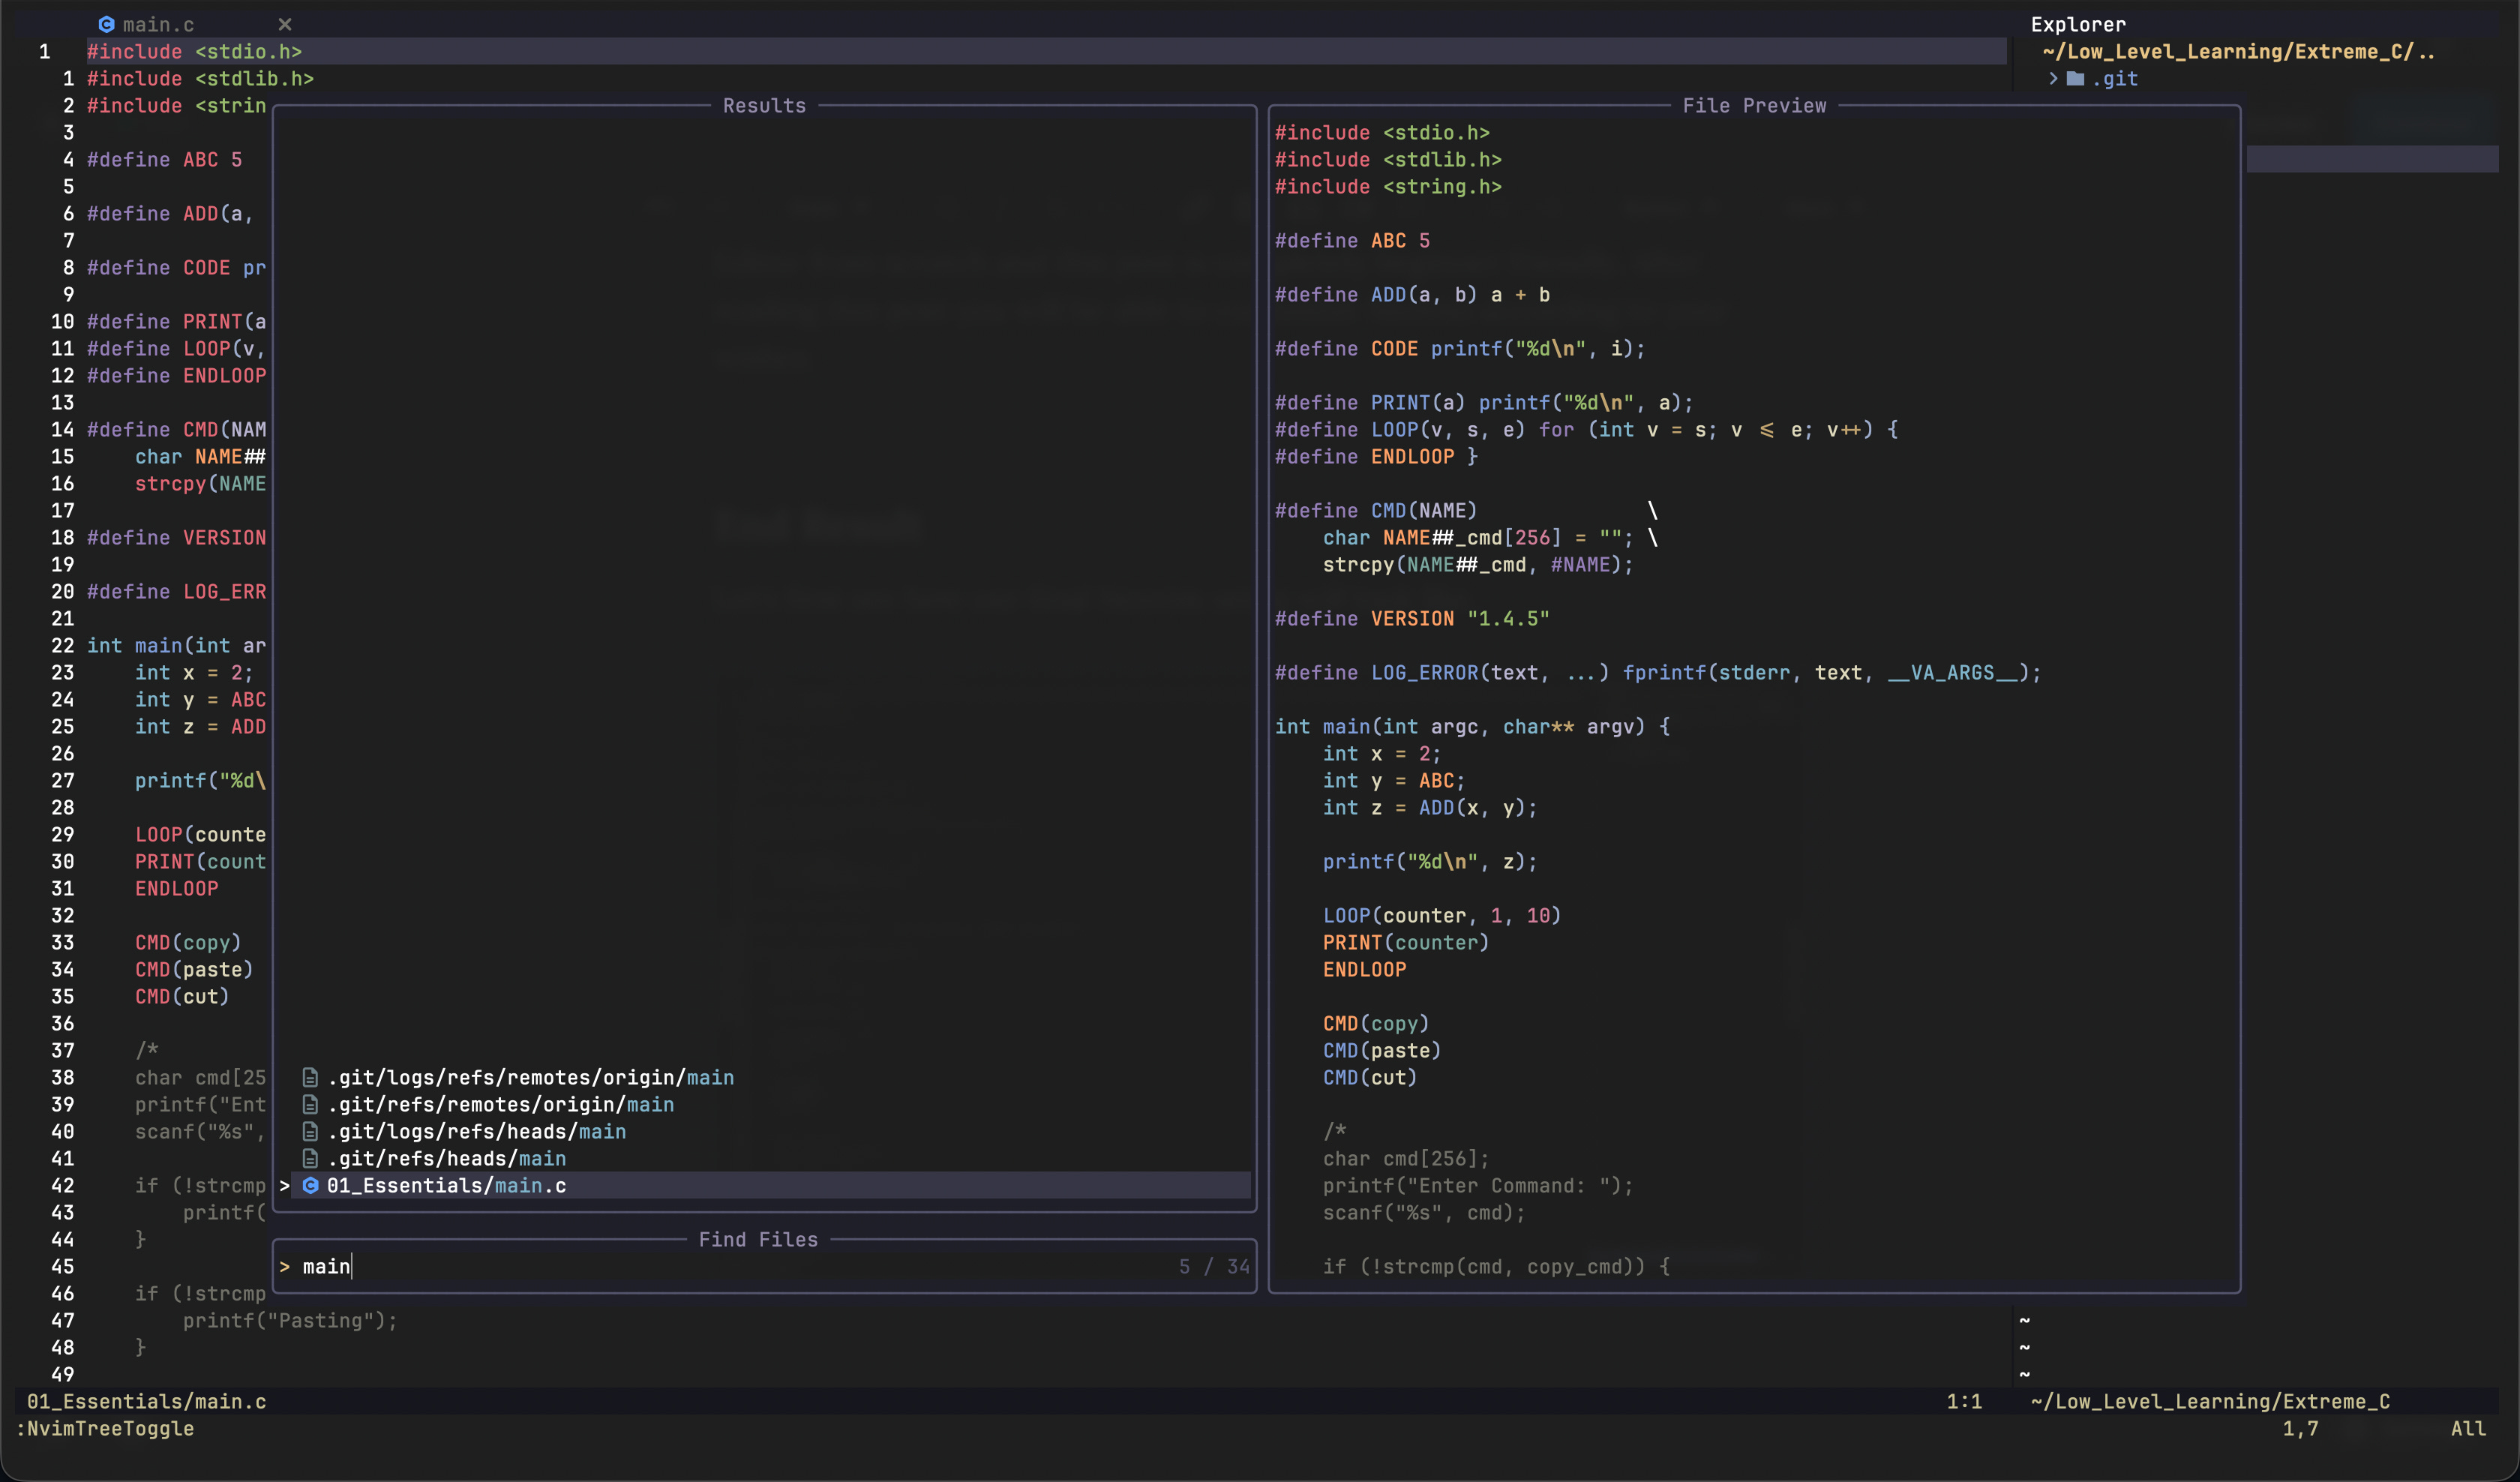
Advance Searching using Telescope
Terminal Integration
Config Source Code:
HERE (you will need this in few minutes)
Step 1: Install Neovim
Neovim is a Vim fork that comes with capabilities to install plugins. Go to this link and install Neovim in your system.
Step 2: Create Folder Structure
All the configurations for Neovim is written in Lua Programming Language and in following folder
.config/nvimCreate this folder if not exists. Than create following folders in your .config/nvim directory.
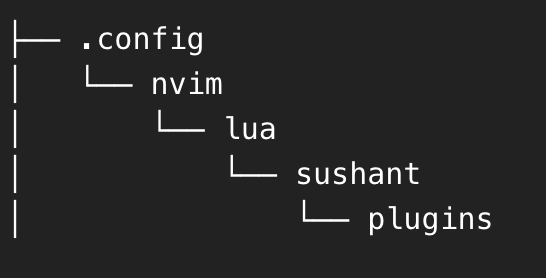
sushant can be replaced with your name. Make sure folder structure is exactly same. At the end we will have a configuration that is easy to extend and customize be beginners that’s why I choose this folder structure.
Step 3: Create init.lua
init.lua is entry point for our configuration. Create this file in .config/nvim directory and paste following code.
IMPORTANT: Substack default code embed functionality is not very good so HERE is the link for all the code used in this tutorial.
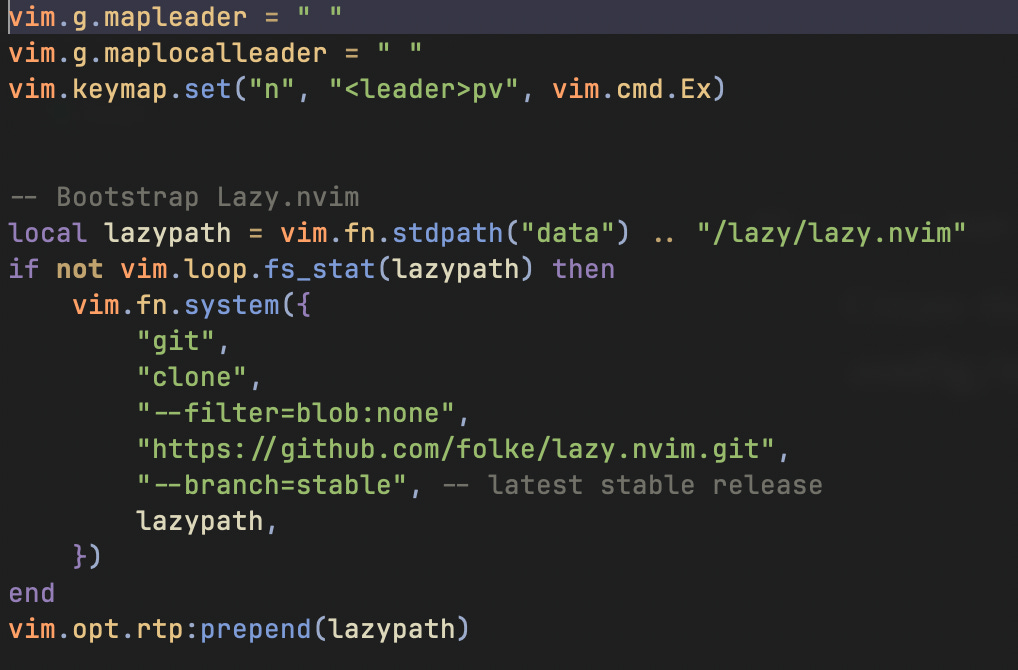
Here we are telling Neovim that leader key is space. Leader key is used for sending commands to Neovim (we will see it later). We are also installing Lazy Package Manager. This will allow us to install plugins in our Neovim.
Save this and reopen Neovim. It will automatically install Lazy Package Manager.
Step 4: Add Some Plugins
It’s time for us to install some plugins in our Neovim Setup. This process is very critical so please read it carefully.
All our plugins will go inside following directory.
.config/nvim/lua/<name_you_choose>/pluginsWe are maintaining separate file for each plugin to organize things. See below screenshot for more clarity.

Our approach is like this:
Every plugin configuration have separate file inside .config/nvim/lua/<name>/plugins folder.
We will later import all these plugins via init.lua file.
This way whenever we need to add a new plugin or configure existing we can just go to plugins folder and edit things there.
What every plugin does?
Bufferline: Provides VS Code like tabs.
Colorscheme: Contains theme configuration.
Error Lens: Shows error ahead of code.
Git Signs: Shows git related signs on files.
LazyGit: CLI based Git Client.
LSP: Contains Mason. A plugin for Language Server Protocol configuration. It provide features like Auto Completion.
Nvim Tree: The file explorer you can see on the right.
Telescope: Search through files.
Treesitter: Syntax highlighting for every programming language.
Important Plugins & Their Settings:
For the sake of simplicity of this article we won’t dive into every piece of code of every plugin. Instead I’ll show you some important plugins and some settings that you can configure.
Mason
Following is the code for Mason. ensure_installed option make sure given LSP servers are installed automatically. I use Golang so I’ve installed gopls LSP.
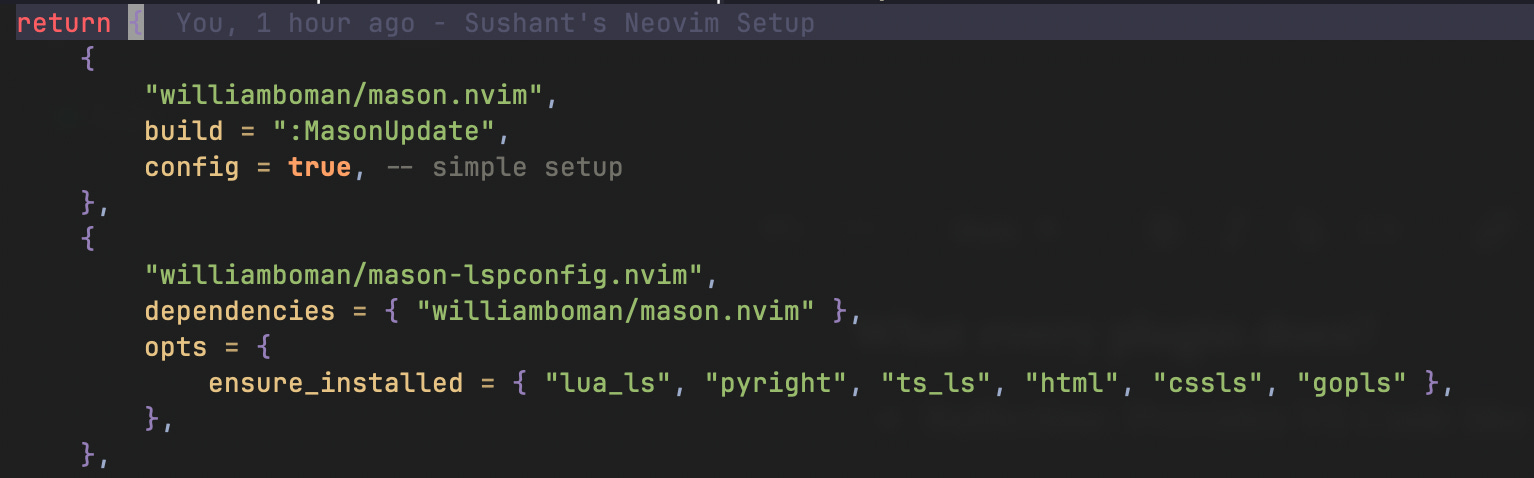
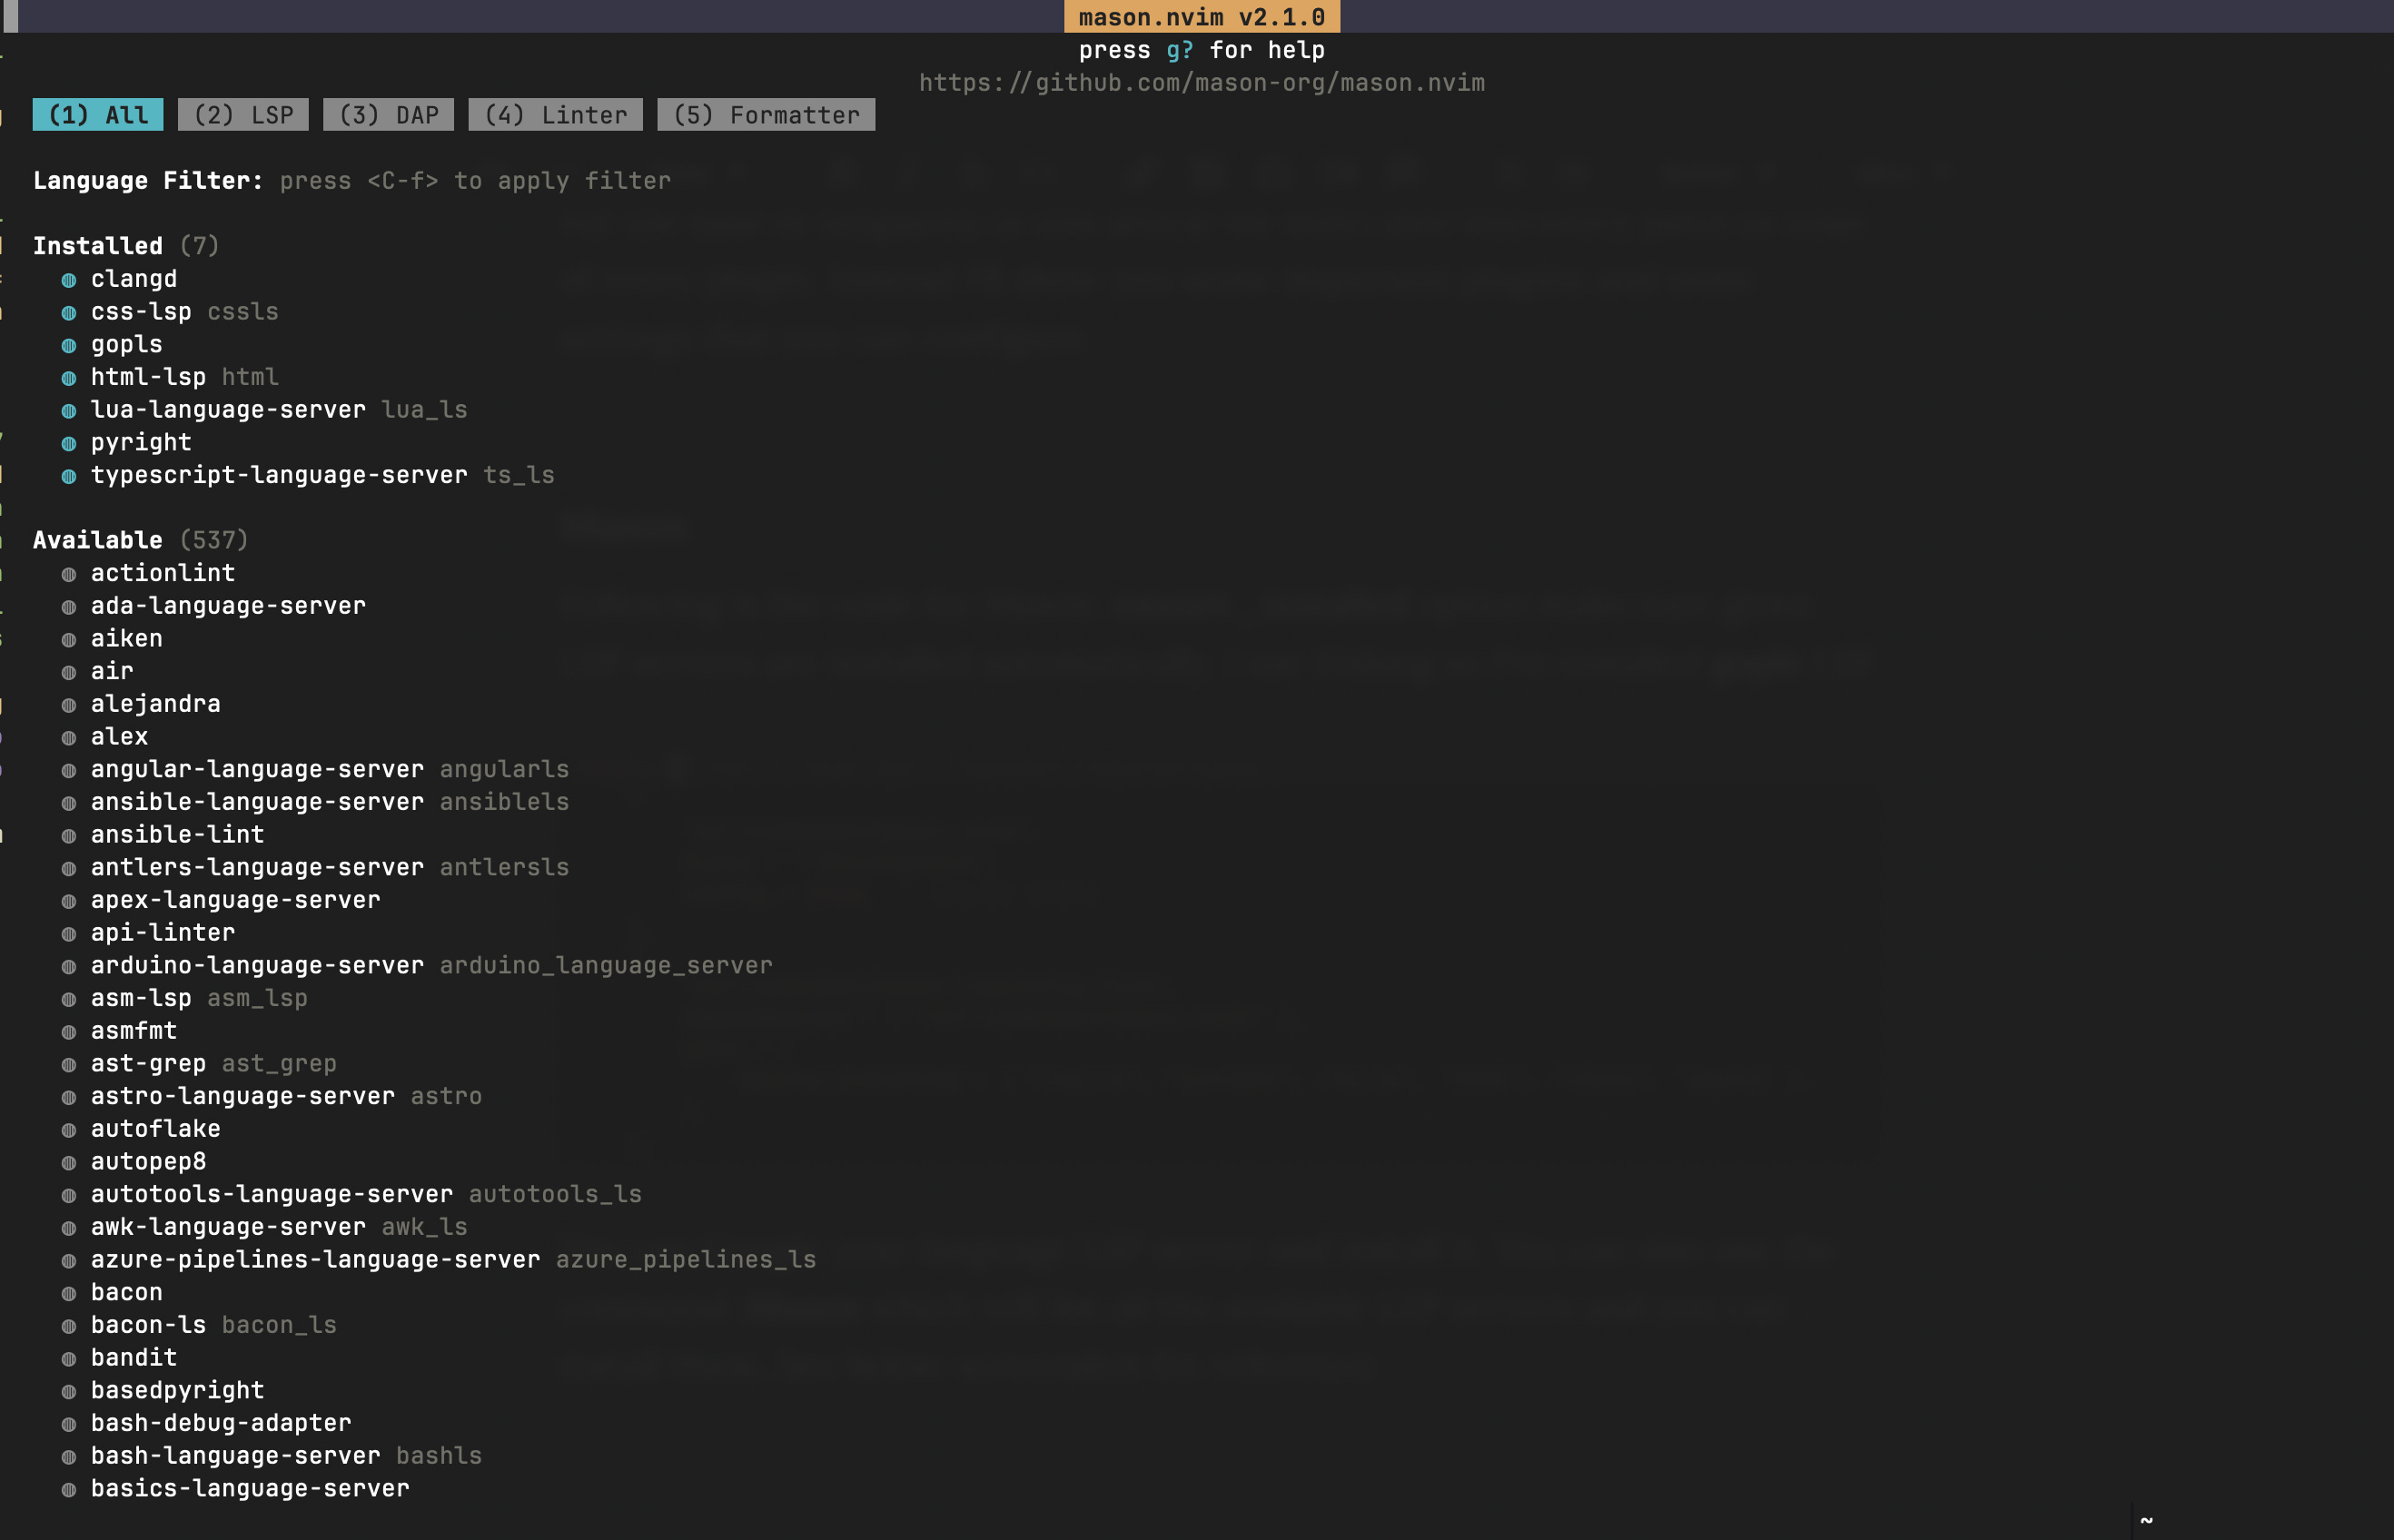
You can Google your language LSP server and install it. You can also use the command :Mason which will list all the available LSP servers and you can install them. See below screenshot for reference.
Treesitter
This is also same as Mason in terms of settings. You can pre define which language syntax highlighting you want in ensure_installed object.
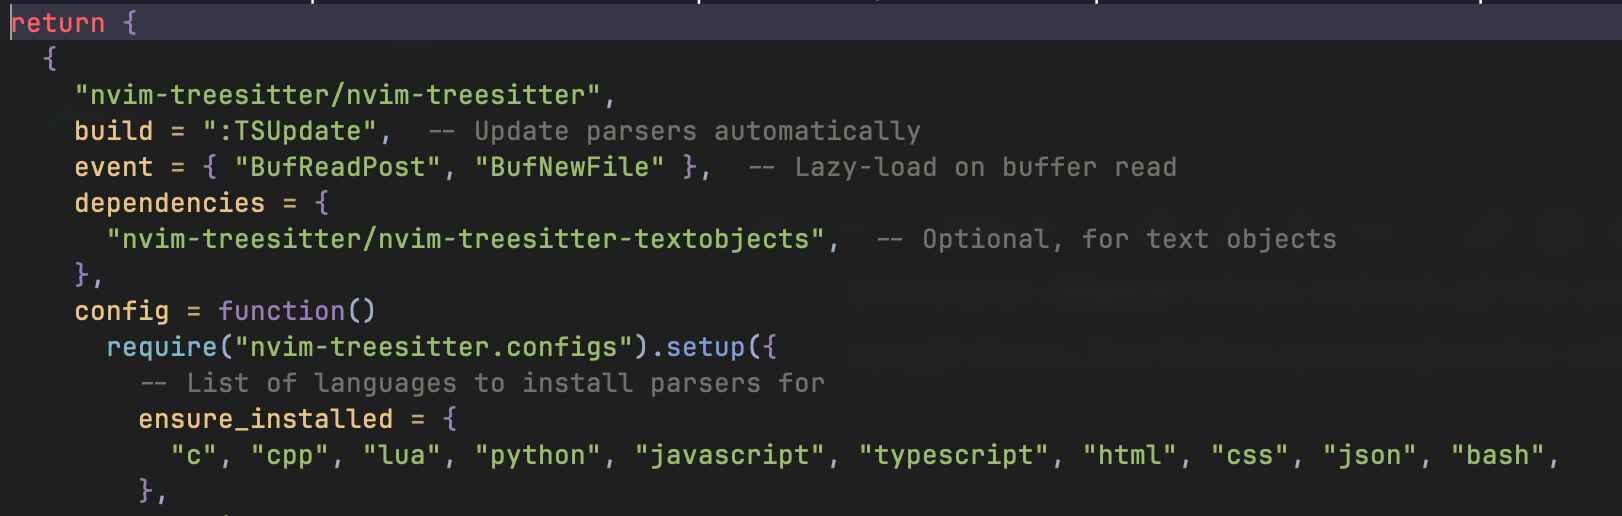
You can also use :TSInstall language_name command to install other language highlighters.
Step 5: Initialize Plugins
Now we have all the plugin configuration sitting inside .nvim/config/lua/<name>/config folder. Let’s load them via our init.lua file.

Following code will load all the plugins from the folder where we have created them.
Step 6: Create Some Shortcuts
Inside /lua/<name>/ folder create a file named keymaps.lua
A Keymap in Vim is a keyboard based shortcut for a command. Let’s see how we can create a keymap.
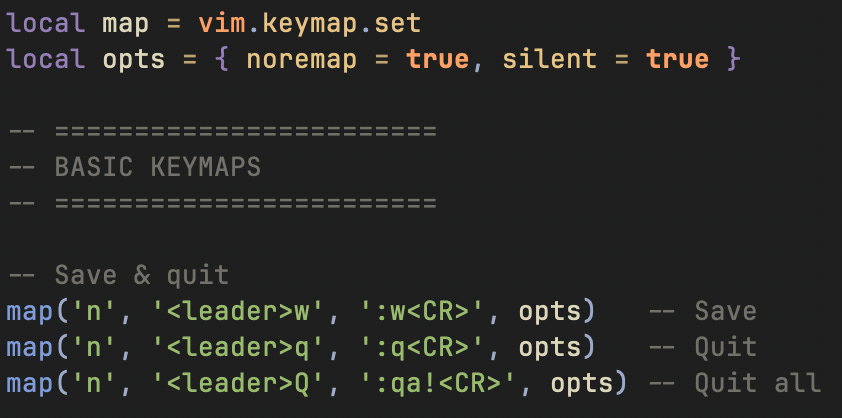
map() function let us create new keymaps.
‘n‘ means normal mode.
<leader> key is space bar that we specified in the very beginning.
:w<CR> is the command to run when <leader>w is pressed.
You can create your own Keymaps with this same syntax. Although I’ve added a lot of keymaps in my configuration that you can go though.
Important Keymaps From My Config
CTRL + h - Focus left.
CTRL + l - Focus Right
Space + x - Close currently opened file.
CTRL + n - Toggle File Explorer
a - Create file while focusing on file explorer.
Leader + ff - Find files via Telescope.
Leader + fg - Find text in files via Telescope.
Leader + fb - Find opened files.
/ - Search in current file.
Shift + h - Go to left buffer.
Shift + l - Go to right buffer.
CTRL + \ - Toggle terminal.
Leader + lg - Open Lazy Git.
Step 7: Fine Tuning
For some fine tuning we will after some of the Neovim settings. Create a file named custom_settings.lua inside /lua/<name>/ directory.
Following is the code for that file:
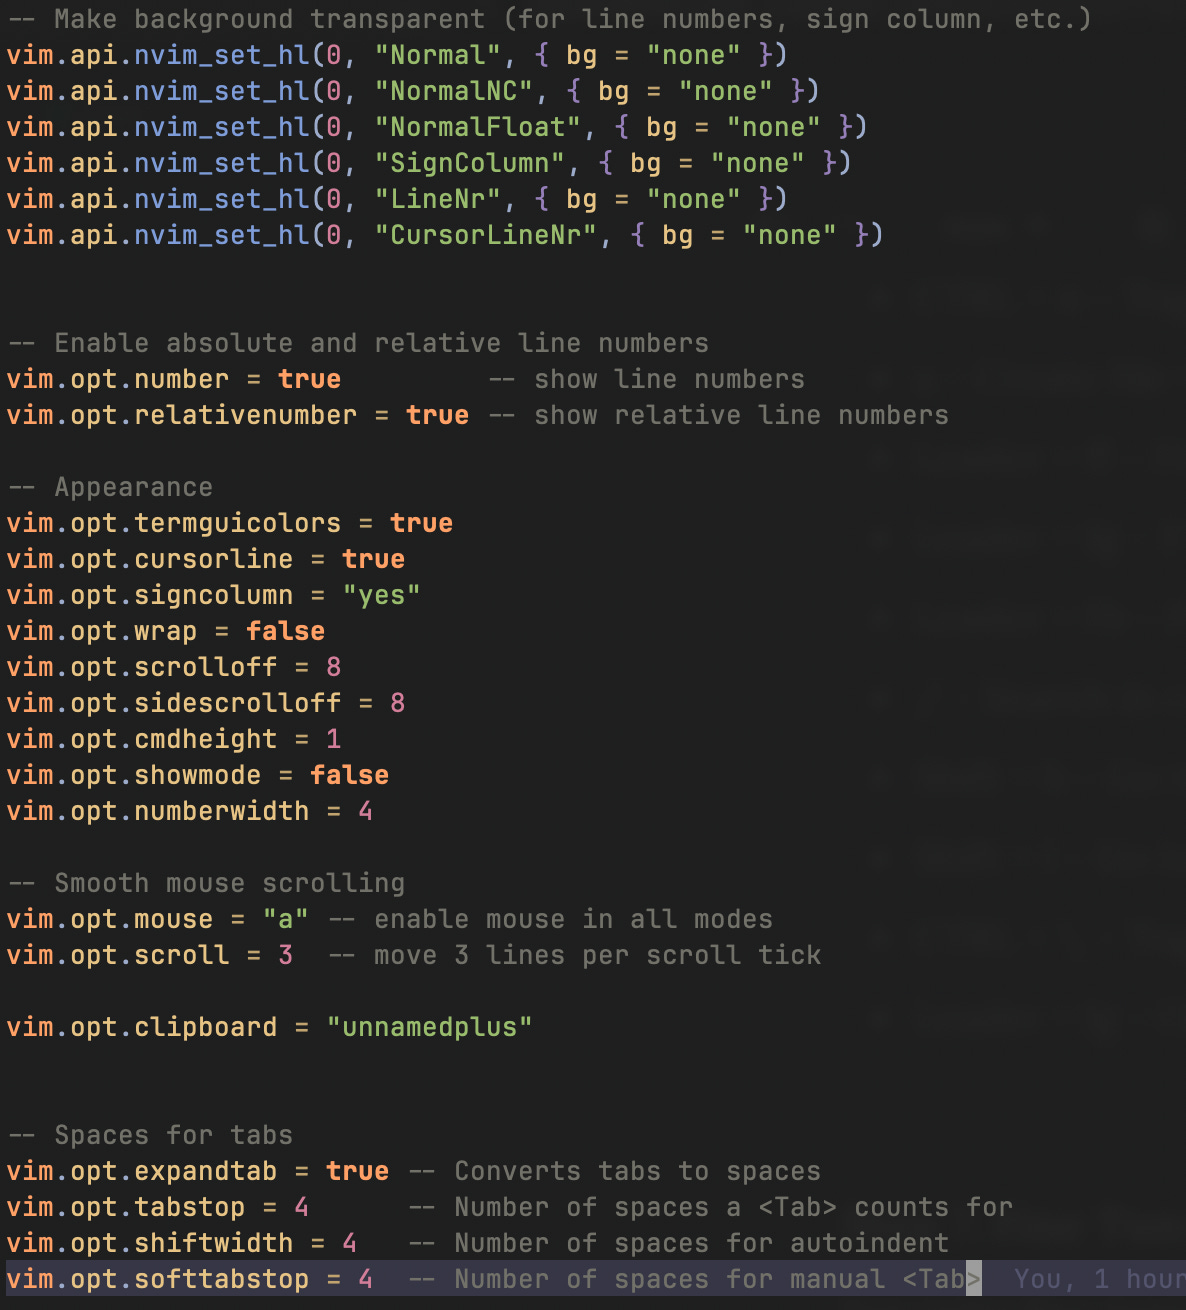
This code is self explanatory. It makes line numbers visible and relative, make our neovim setup transparent and etc.
Step 8: Initialize Keymaps & Settings
Our keymaps and settings are just sitting in a file but they are never initialized. So we will create an init.lua file inside .config/nvim/lua/<name>/ directory and add following code.

and finally in our root init.lua file we can do this

When we require folder sushant it will execute it’s init.lua file which will execute keymaps.lua and custom_settings.lua file.
Important:
For Telescope search make sure Live Grep is installed in your system.
For any LSP to work in Neovim is must be installed in your system.
Subscribe to this newsletter for free updates.
Thank You
If you reached this far you have given me few minutes of your life and I’m grateful to it. Also please comments your thoughts if any.